Streaming or recording your gameplay with a low-end PC can feel frustrating. Laggy videos, dropped frames, and high CPU usage often ruin the experience, both for you and your viewers. But with the right settings, you can still produce smooth, watchable content without breaking the bank.
In this guide, I’ll walk you through the best OBS Studio setup tailored for low-spec computers in 2025. Whether you want to stream on Twitch, YouTube, or just record clips, these tips will help you get the most out of your hardware.
Understanding Your PC’s Limits
Note
Before we dive in, it’s essential to know your PC’s specifications.
Press Ctrl + Shift + Esc to open Task Manager, then check your CPU, RAM, and GPU details under the Performance tab.
Here, you can see your CPU model, memory (RAM) size, and GPU details. Knowing these specs helps you choose the best OBS settings that won’t overload your system.
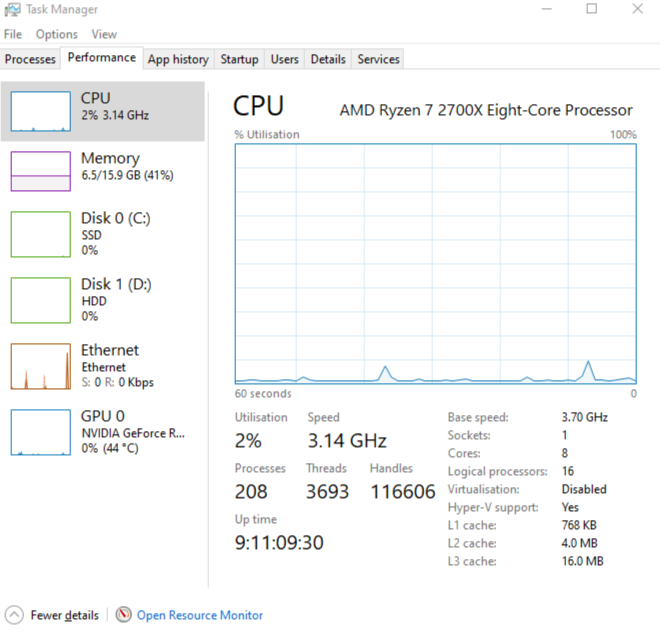
Your computer’s CPU, RAM, and GPU play a major role in how smoothly OBS will run.
For streaming or recording, your CPU should ideally be at least a dual-core processor, and you’ll want a minimum of 4GB RAM, though more is always better. If your PC has a dedicated GPU that supports hardware encoding (like NVIDIA’s NVENC, Intel’s QuickSync, or AMD’s VCE), OBS can use this to reduce CPU load significantly.
Installing and Updating OBS Studio
To get the best performance out of OBS on a low-end PC, always start with the latest version of the software. OBS Studio frequently releases updates that improve stability, fix bugs, and introduce performance improvements, especially important for users with limited hardware.
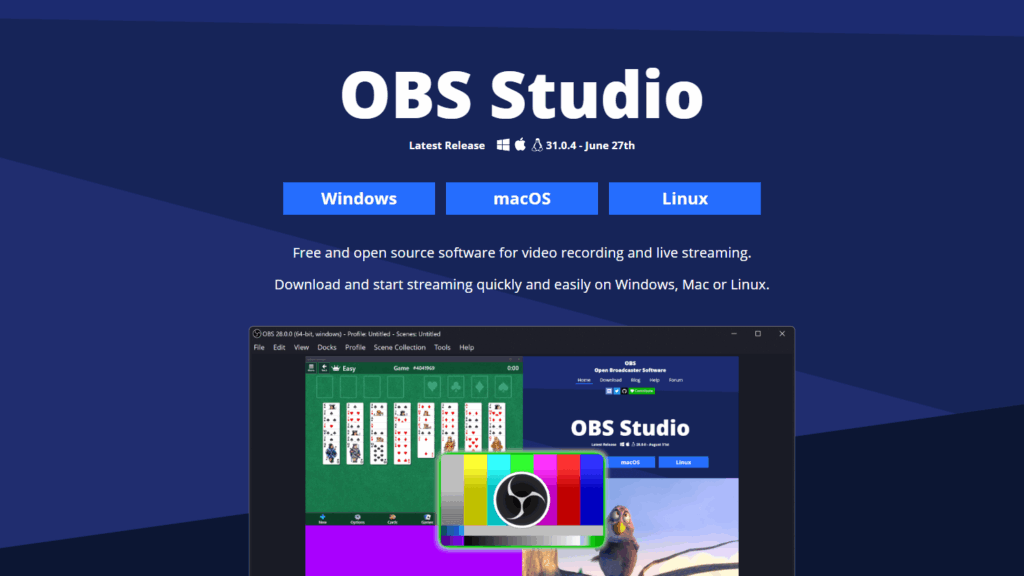
You can download OBS Studio for free from the official website. Make sure to choose the version compatible with your operating system (Windows, macOS, or Linux) and follow the installation guide.
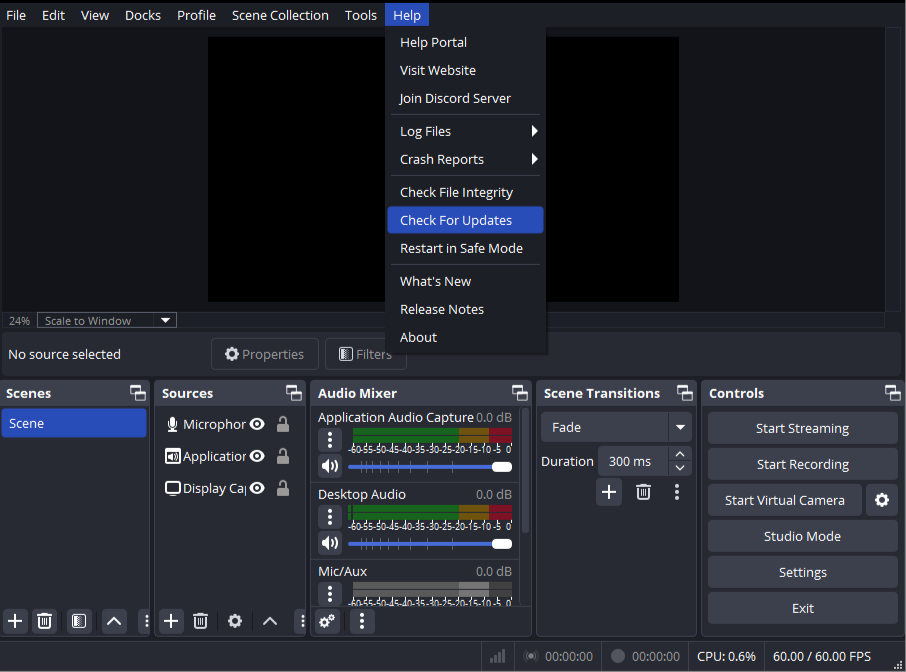
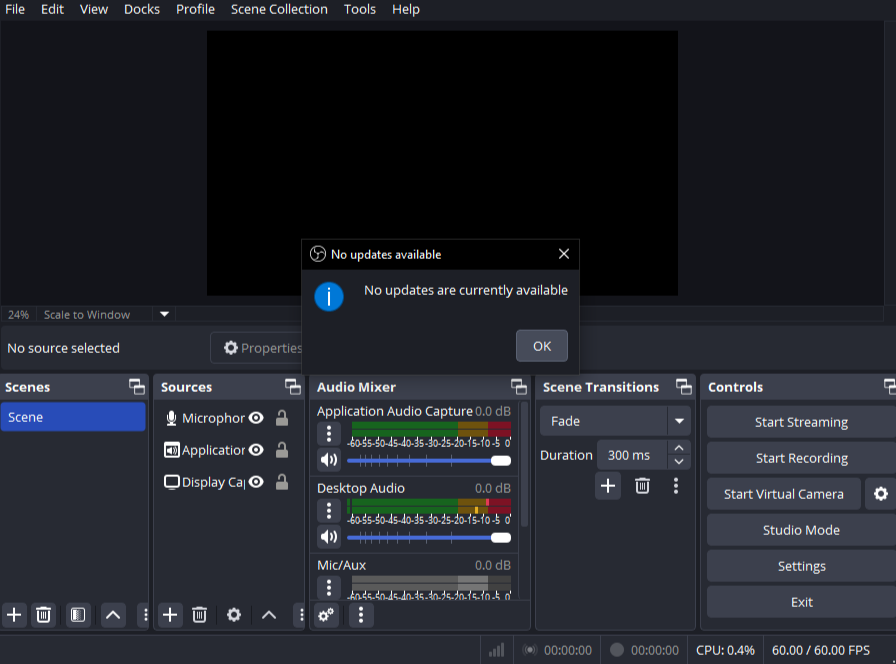
After installing, regularly check for updates within OBS by clicking Help – Check for Updates.
Note
Always make sure you are using the latest version of OBS Studio. Updates often bring performance improvements and bug fixes that are especially helpful for lower-end PCs.
Key OBS Settings
Video Settings
Optimizing your video settings in OBS is essential for smooth streaming and recording on low-end PCs. To do that, simply click File – Settings – Video. Here’s what you should focus on:
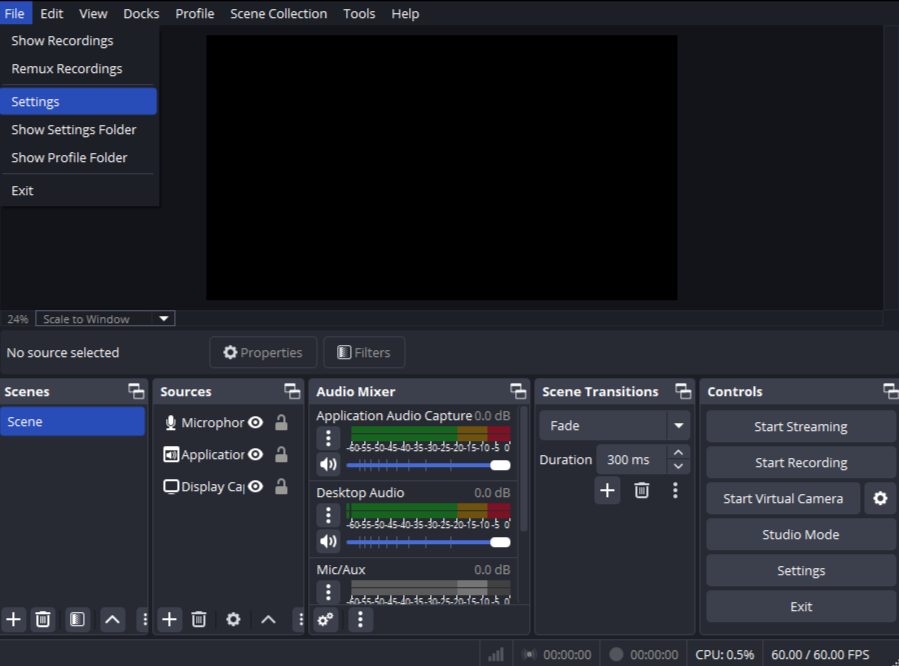
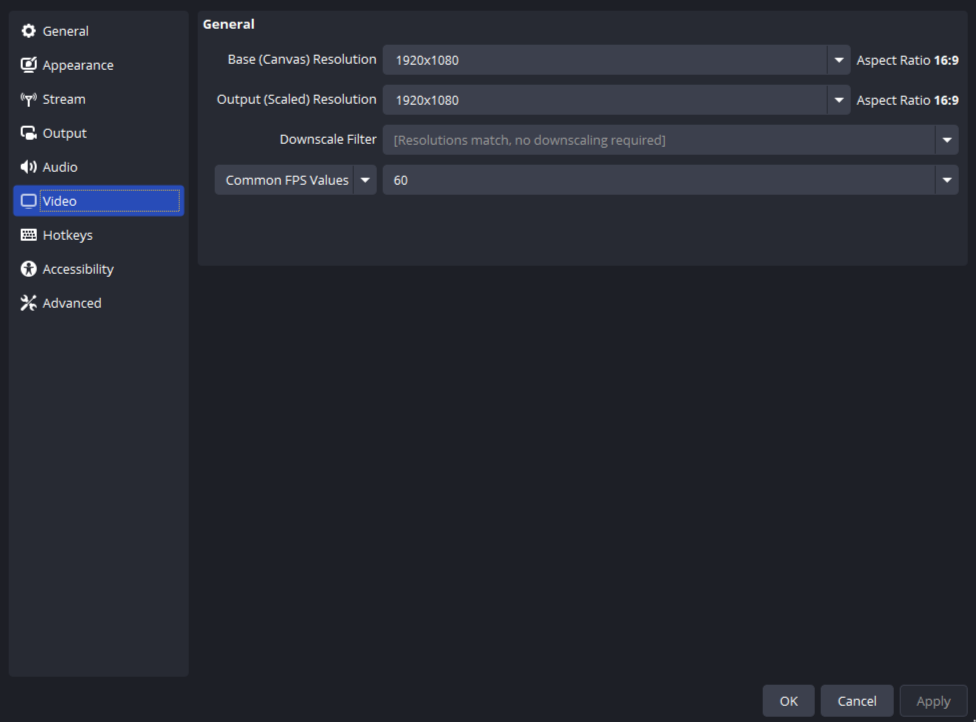
- Base (Canvas) Resolution: This should usually match your monitor’s resolution.
- Output Resolution: Lowering your output resolution reduces the workload on your CPU and GPU. For low-spec systems, streaming at 720p (1280×720) or even 480p (854×480) can greatly improve performance without sacrificing too much visual quality.
- Downscale Filter: Set this to Bilinear for the lowest CPU usage, though it slightly reduces image sharpness. If your PC can handle it, Lanczos offers better quality but uses more resources.
- Frame Rate (FPS): While 60 FPS offers very smooth video, it’s more demanding on your hardware. For weaker PCs, setting your frame rate to 30 FPS strikes a good balance between smoothness and system load.
Note
Setting these settings right helps keep your stream or recording lag-free and enjoyable for viewers, even on modest hardware.
Output Settings
The output settings in OBS have a big impact on your stream or recording quality and on how hard your PC has to work. Here’s how to optimize them:
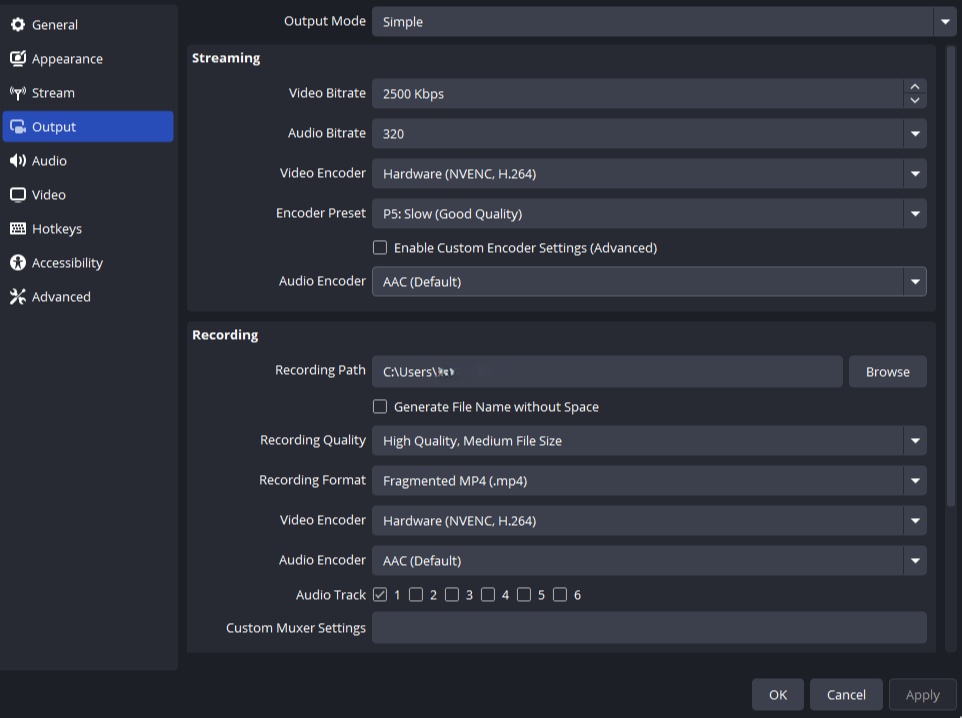
- Video Bitrate: This controls video quality and file size. For streaming, a bitrate between 1500 and 3000 Kbps usually works well on slower PCs and typical internet upload speeds.
- Audio Bitrate: Keep audio bitrate around 128 so you can have quality without overloading your system.
- Video Encoder: Whenever possible, use a hardware encoder such as NVENC (for NVIDIA GPUs), QuickSync (for Intel), or AMD VCE. These offload video encoding from your CPU to your GPU, reducing lag and improving performance. If your PC doesn’t support hardware encoding, use the x264 software encoder, but keep settings modest.
- Encoder Preset: If you’re using the x264 video encoder, then pick either P1 Fastest (Lowest Quality) or P2 Faster (Lower Quality). These settings minimize CPU usage but sacrifice some quality.
Note
Optimizing these output settings will help you achieve smooth, high-quality streams or recordings without overwhelming your PC.
Audio Settings
Good audio quality is just as important as video, but on low-end PCs, it’s best to keep audio settings simple to avoid extra strain on your system.
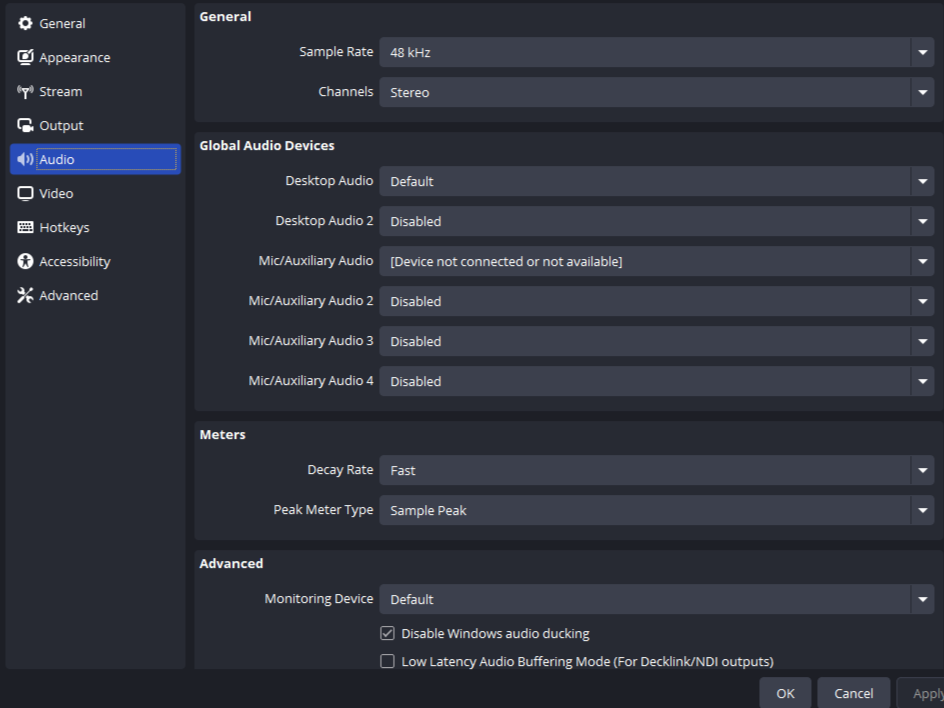
- Sample Rate: Use 44.1 kHz or 48 kHz, both are standard and compatible with most streaming platforms.
Extra tips:
- Avoid Excessive Filters: While OBS allows adding filters like noise suppression or compression, these can increase CPU load. Use only essential filters and test performance to ensure smooth streaming.
- Use a Dedicated Microphone Input: If possible, capture audio from a single, dedicated source rather than multiple inputs to simplify processing.
- Monitor Your Audio: Keep an eye on OBS’s audio meters to avoid clipping or distortion, but don’t overcomplicate the setup.
Note
Clean audio settings help keep your stream or recording smooth and your audience engaged without frying your PC.
Scene and Source Optimization
Keeping your OBS scenes and sources simple is key. Avoid complex setups that can quickly eat up CPU and GPU resources, leading to laggy streams or dropped frames. Here’s what you should do:
- Limit the Number of Sources: Use only essential sources in each scene. Avoid layering too many images, browser sources, or video captures.
- Prefer Game Capture Over Display Capture: Game Capture is more efficient because it captures only the game window, reducing system load compared to Display Capture, which records your entire screen.
- Avoid Browser Sources When Possible: Browser sources can be resource-heavy. If you need overlays or alerts, use lightweight alternatives or static images.
- Use Static Images or Simple Overlays: Animated overlays or high-resolution images consume more processing power. Stick to simple, static graphics for best performance.
Optimizing your scenes and sources helps keep your streams smooth and your viewers happy.
Testing and Troubleshooting
Always test your stream or recording first. Look out for dropped frames or CPU spikes in the OBS stats window.
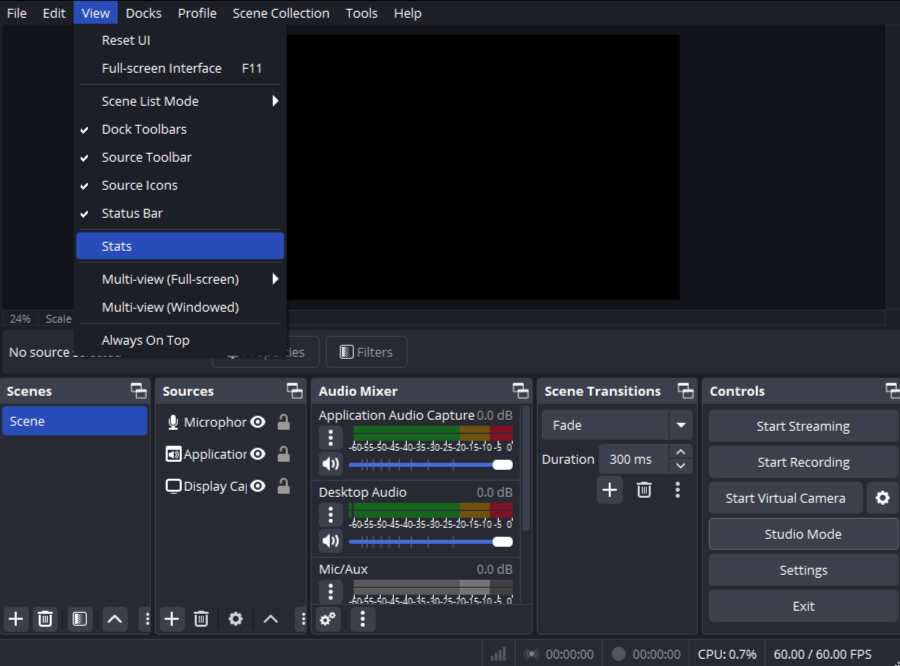
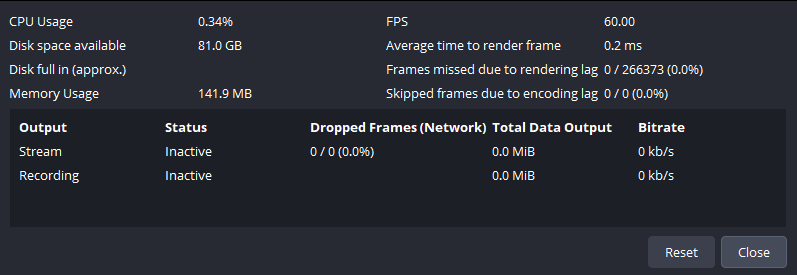
- Run Test Streams or Recordings: Use the Start Recording or Start Streaming buttons to do short tests. Watch for dropped frames, audio sync issues, or lag.
- Check OBS Stats: Open the Stats window in OBS to monitor CPU usage, dropped frames, and encoding lag. High values here indicate your PC might be struggling.
- Update Drivers and Software: Keep your GPU drivers and OBS Studio updated for the best compatibility and performance.
- Use Performance Monitoring Tools: Tools like Windows Task Manager or third-party apps can help you track resource usage while streaming.
Note
Testing and troubleshooting your OBS setup regularly ensures a smoother streaming or recording experience.
Bonus Tips
To get the most out of your OBS setup, here are some extra tips to boost performance and improve your streaming experience:
- Enable Windows Game Mode
- Consider Lowering In-Game Graphics Settings
- Use a Wired Internet Connection
Streaming or recording on a low-end PC may seem annoying and challenging at first, but with the right OBS setup and some patience, you can create great content without spending a dime. Don’t be afraid to experiment to find what works best for you. Do you have any questions or tips of your own? Drop a comment below, I would love to hear from you!


