Over the years, I’ve used all kinds of tweaks, tips, and various ways to improve the gaming performance in Windows and possibly boost the FPS. I found a few simple ways that you can increase the overall performance of your operating system, and those are all based on my personal experience with laptops and desktop PCs.
Although you can skip a few of the following ways, completing them all will surely boost your system’s performance – as far as your hardware’s not to fault here.
1. Learn about your hardware and minimum requirements
Before we get started on tweaking our system, it’s important to know what type of hardware components your desktop PC or laptop has. It’s also very easy, too.
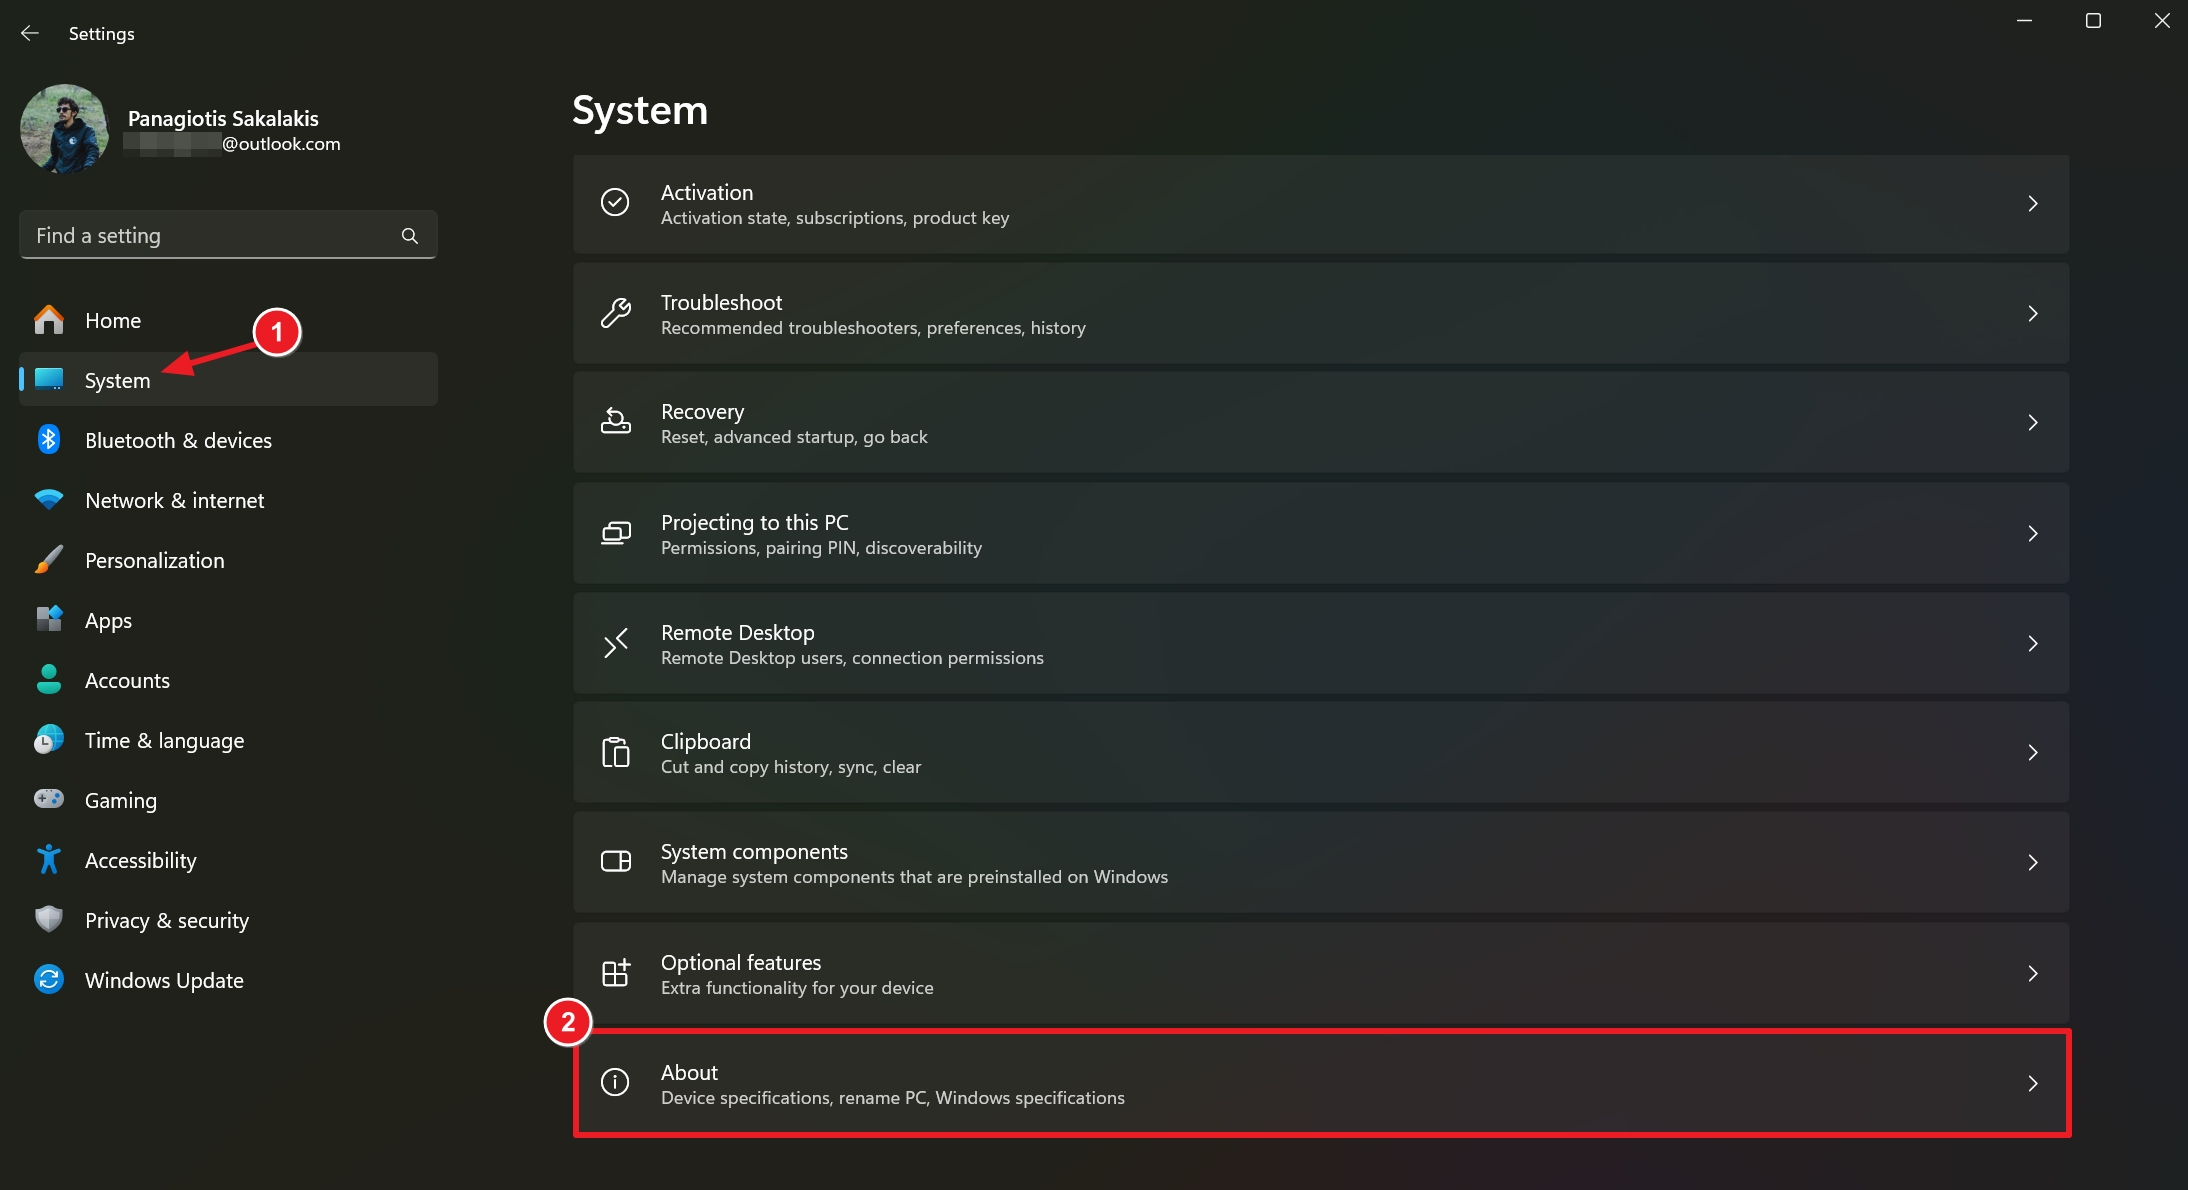
1. Open the Settings in Windows, go to System, and click on About.
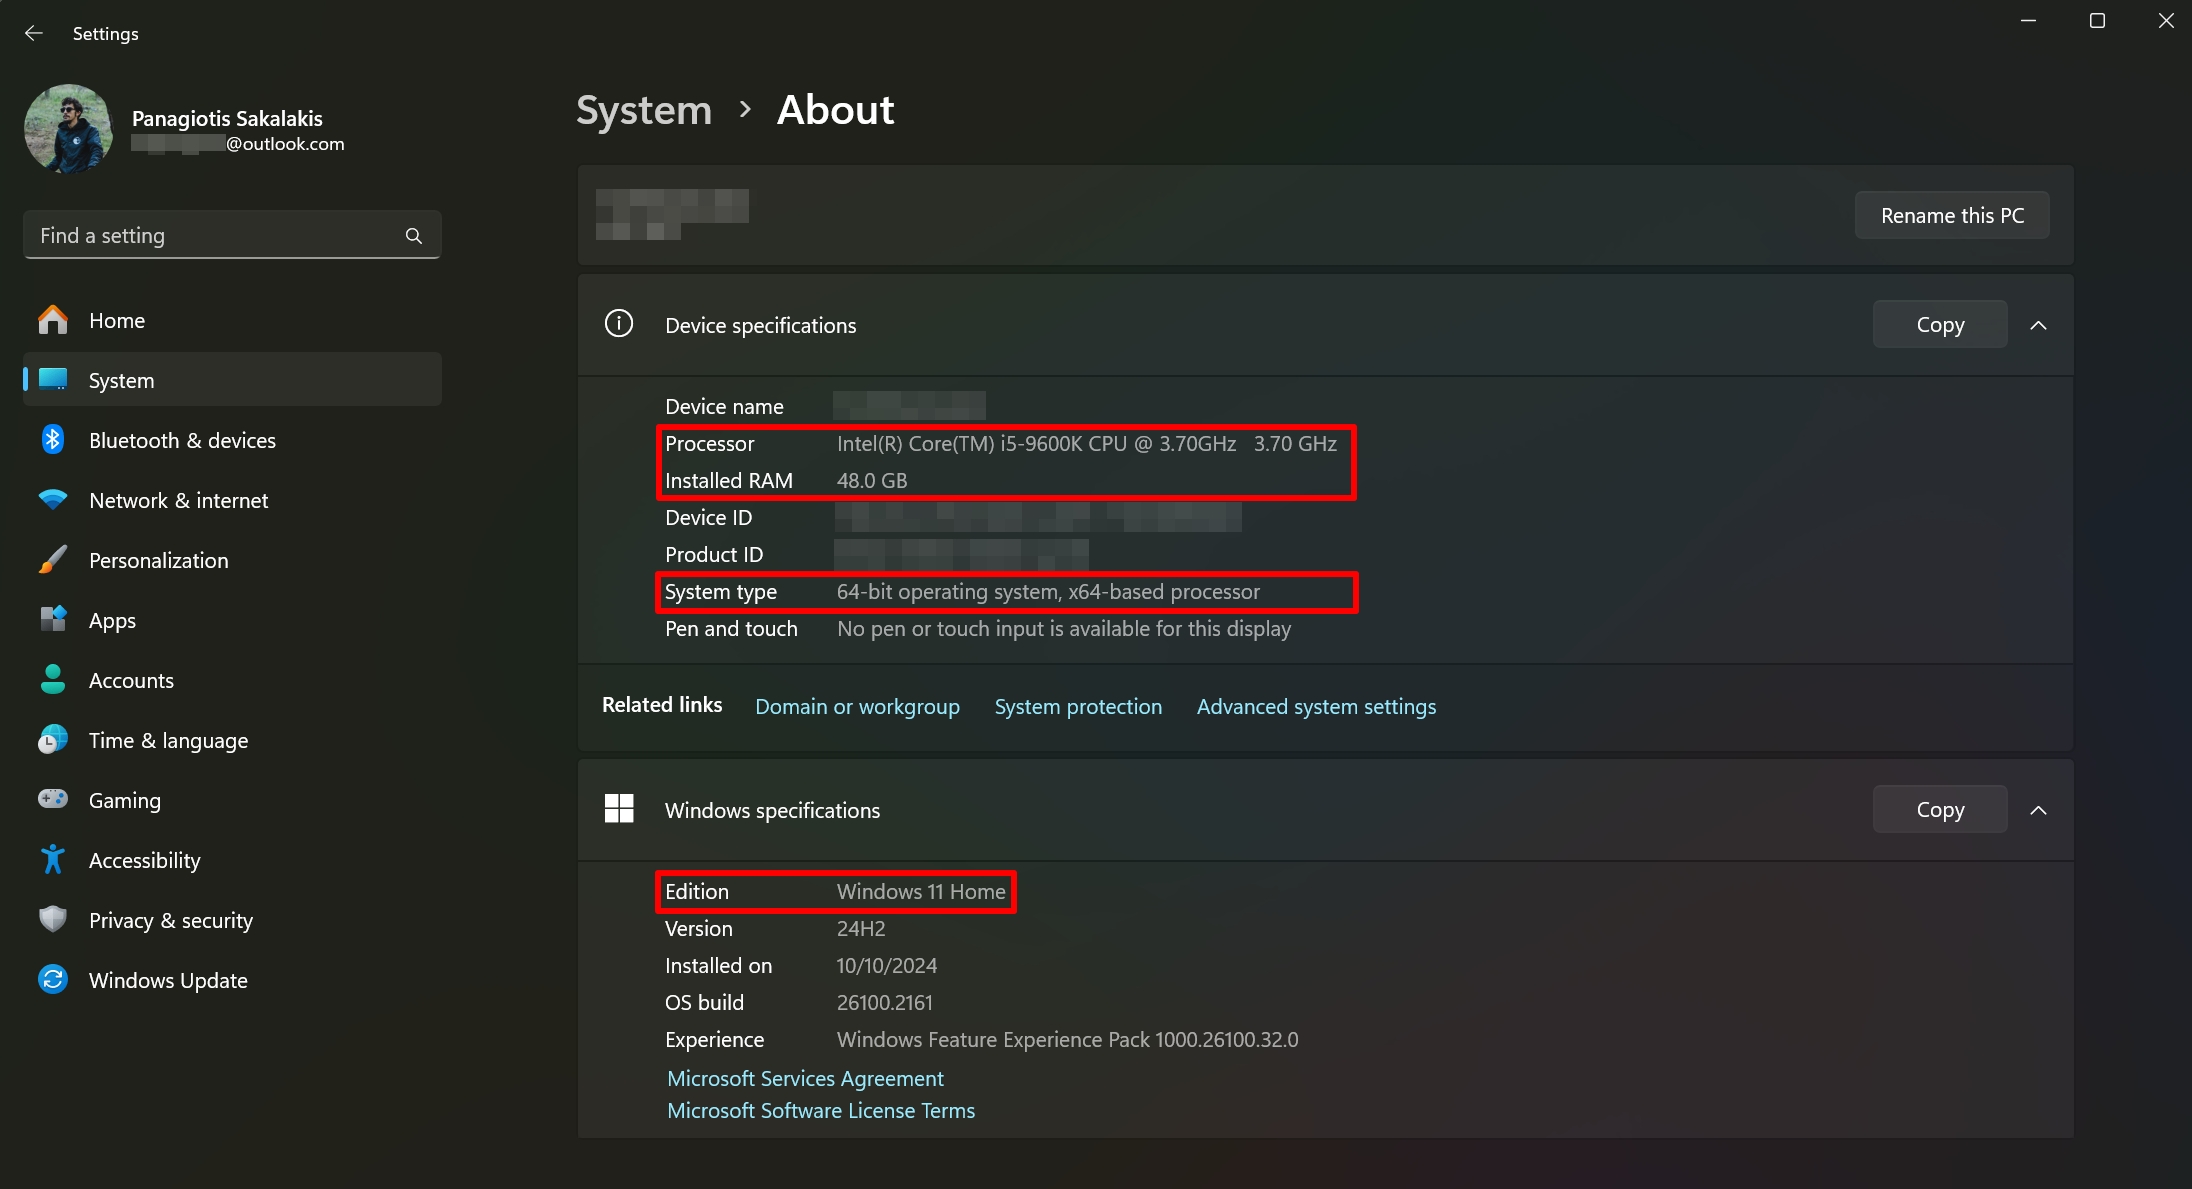
2. Check your Processor’s name and Installed RAM.
3. Search for the game’s minimum requirements.
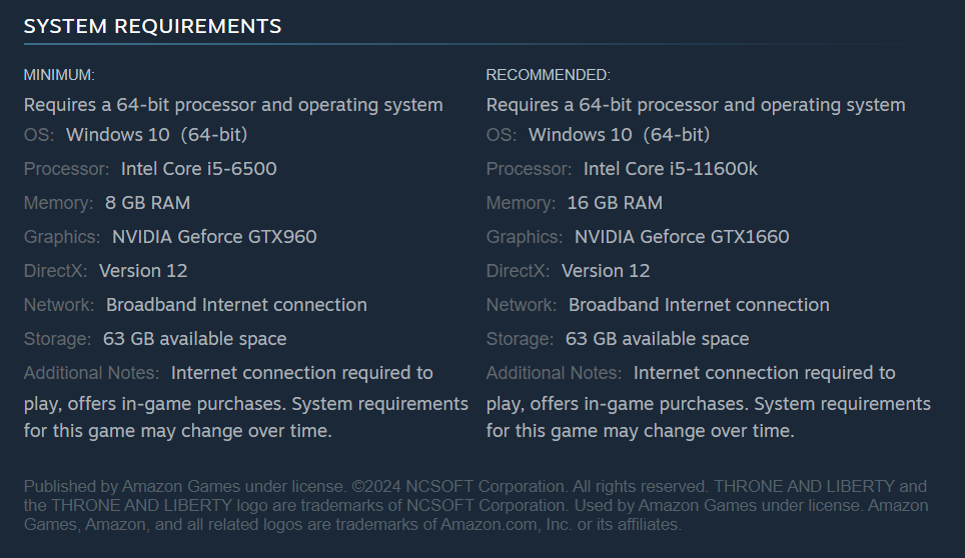
If your PC’s or laptop’s hardware meets the minimum or even the recommended requirements, you can safely download and play it.
Game platforms such as Steam and Epic Games Store also provide the game’s minimum and recommended requirements. If you want to learn even more about your hardware, you can use freemium tools such as the Speccy (a software made by the CCleaner’s team).
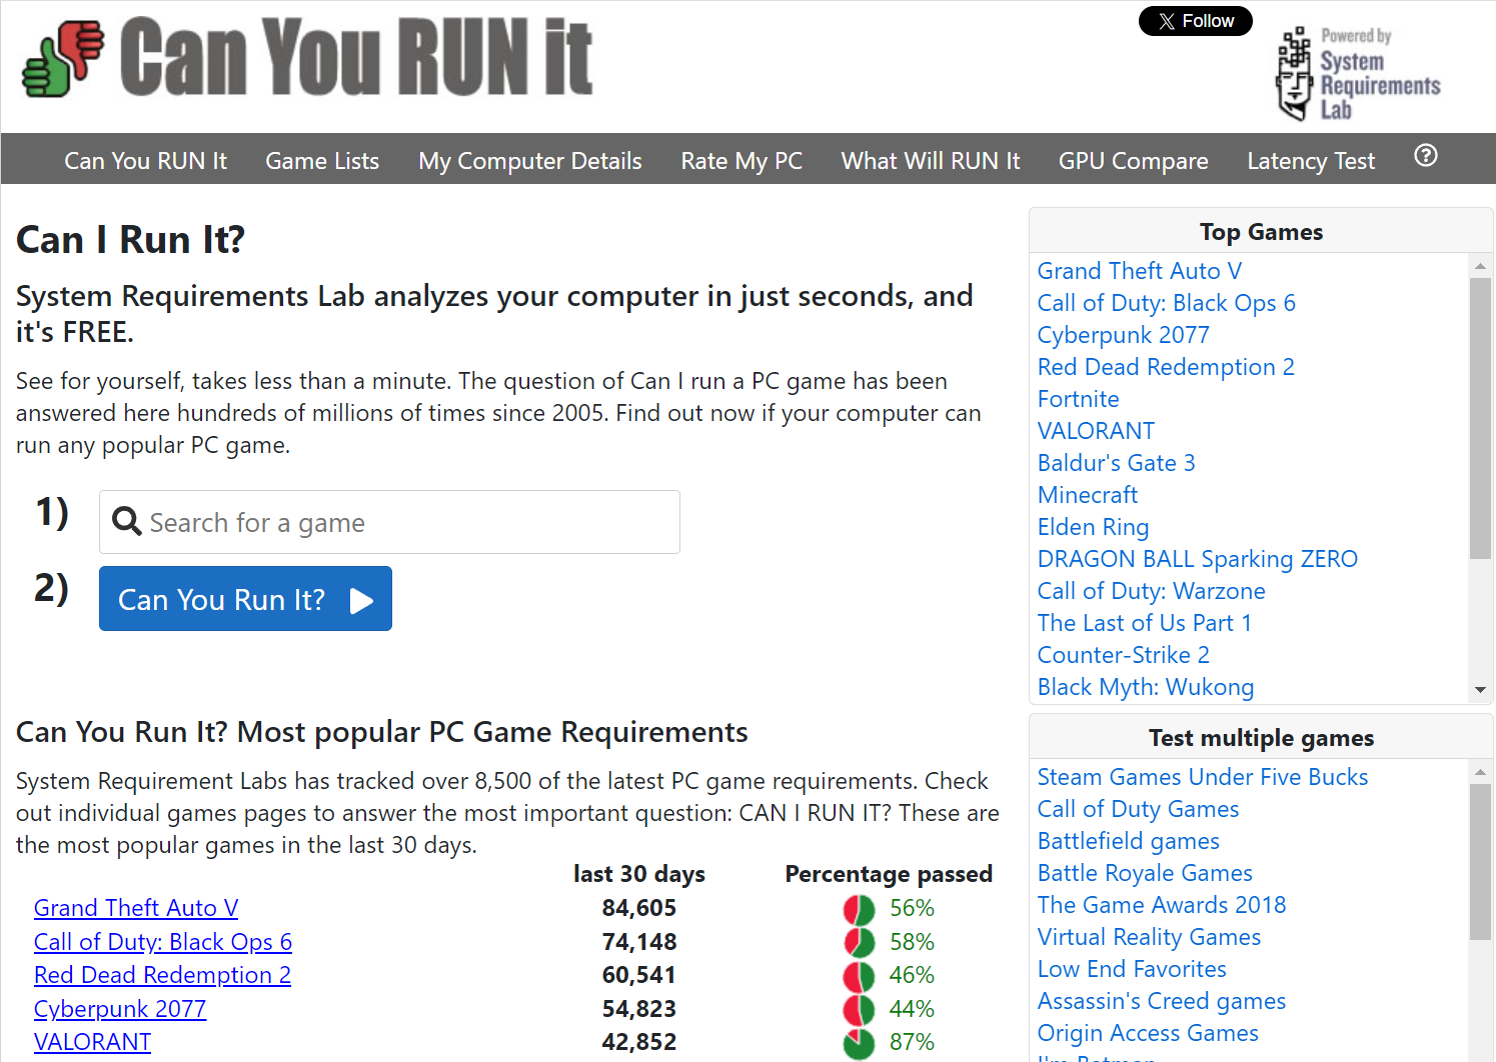
You can also use websites such as the Can You Run It? and My Computer Details tools by Can I Play It? by System Requirements Lab, which gives you a lightweight tool to install on your PC and it can detect if you can play a game or not based on your hardware. If you don’t want to install another software, you can simply create an account and manually add each component.
2. Format or reset Windows
Windows aren’t perfect, and the more you use them the slower they become over time. That’s because of many reasons but mostly of all the data, files, and information that is gathered over time, making your system slower. Think about all those programs that you’ve installed and uninstalled later – probably without the right tool – and all the data they left behind.
To format your PC, you’ll need a USB device with at least 8GB of storage. You can then download the latest ISO file with Windows 10 or Windows 11. Microsoft’s tool will give you the option to create a bootable USB with the operating system, which you can later boot to your PC’s Boot Menu, select the USB device, and start installing the operating system. But that’s not that quick, and you may break a few things, so there’s an easier way.
To reset Windows with a few clicks
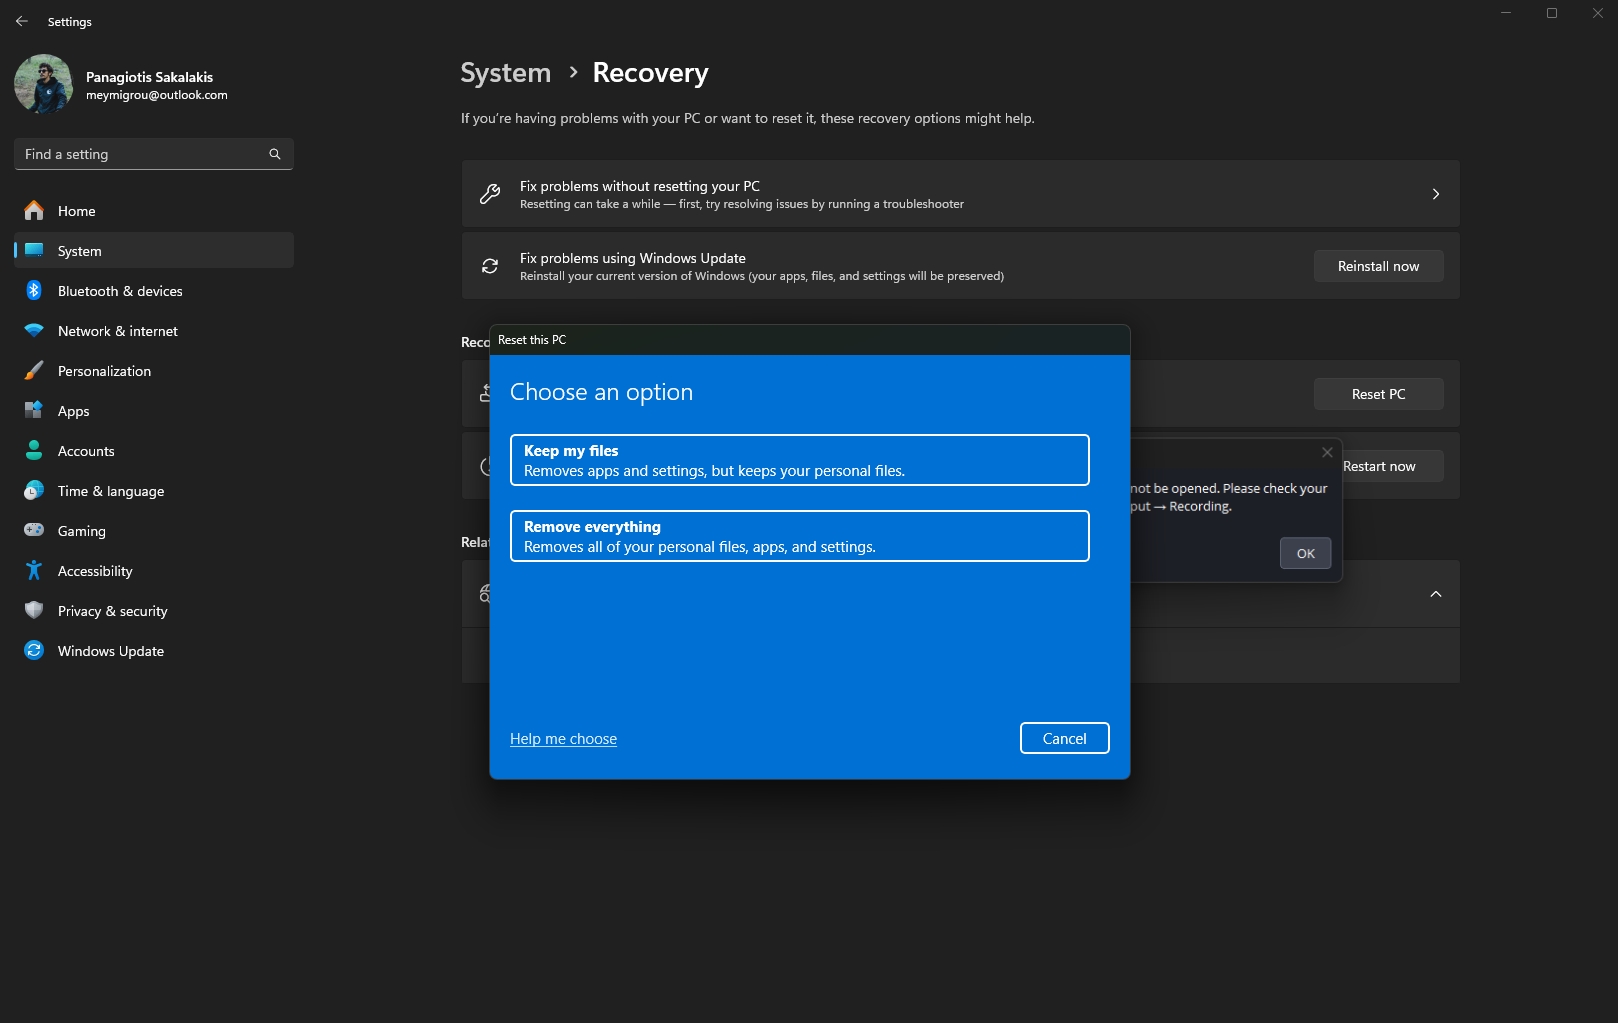
Microsoft has added a great option to reset your Windows PC or laptop from the Settings page, without breaking a sweat. You can also choose to reset Windows and keep all of your personal files or even delete everything. It’s preferred to move all of your files to another external disk or device, and then select to delete everything and get a fully clean start.
- Open the Settings in Windows, go to System, and then click on Recovery.
- Click on the “Reset PC” option.
- Choose “Keep my files” or “Remove everything“.
- Follow the next steps and wait until the tool downloads and starts resetting your PC.
Your device may restart a few times before it’s ready for use, and setting them up is as easy as following a few steps and adding your information. You won’t be needing an activation license as Microsoft will automatically detect it for you.
Formatting or resetting Windows is one of the best ways to get a fresh start and make sure your system is clean and updated. If you just got a new device with Windows or you have already done that, you can tweak Windows even more for increased gaming performance.
3. Start by scanning for viruses and malware
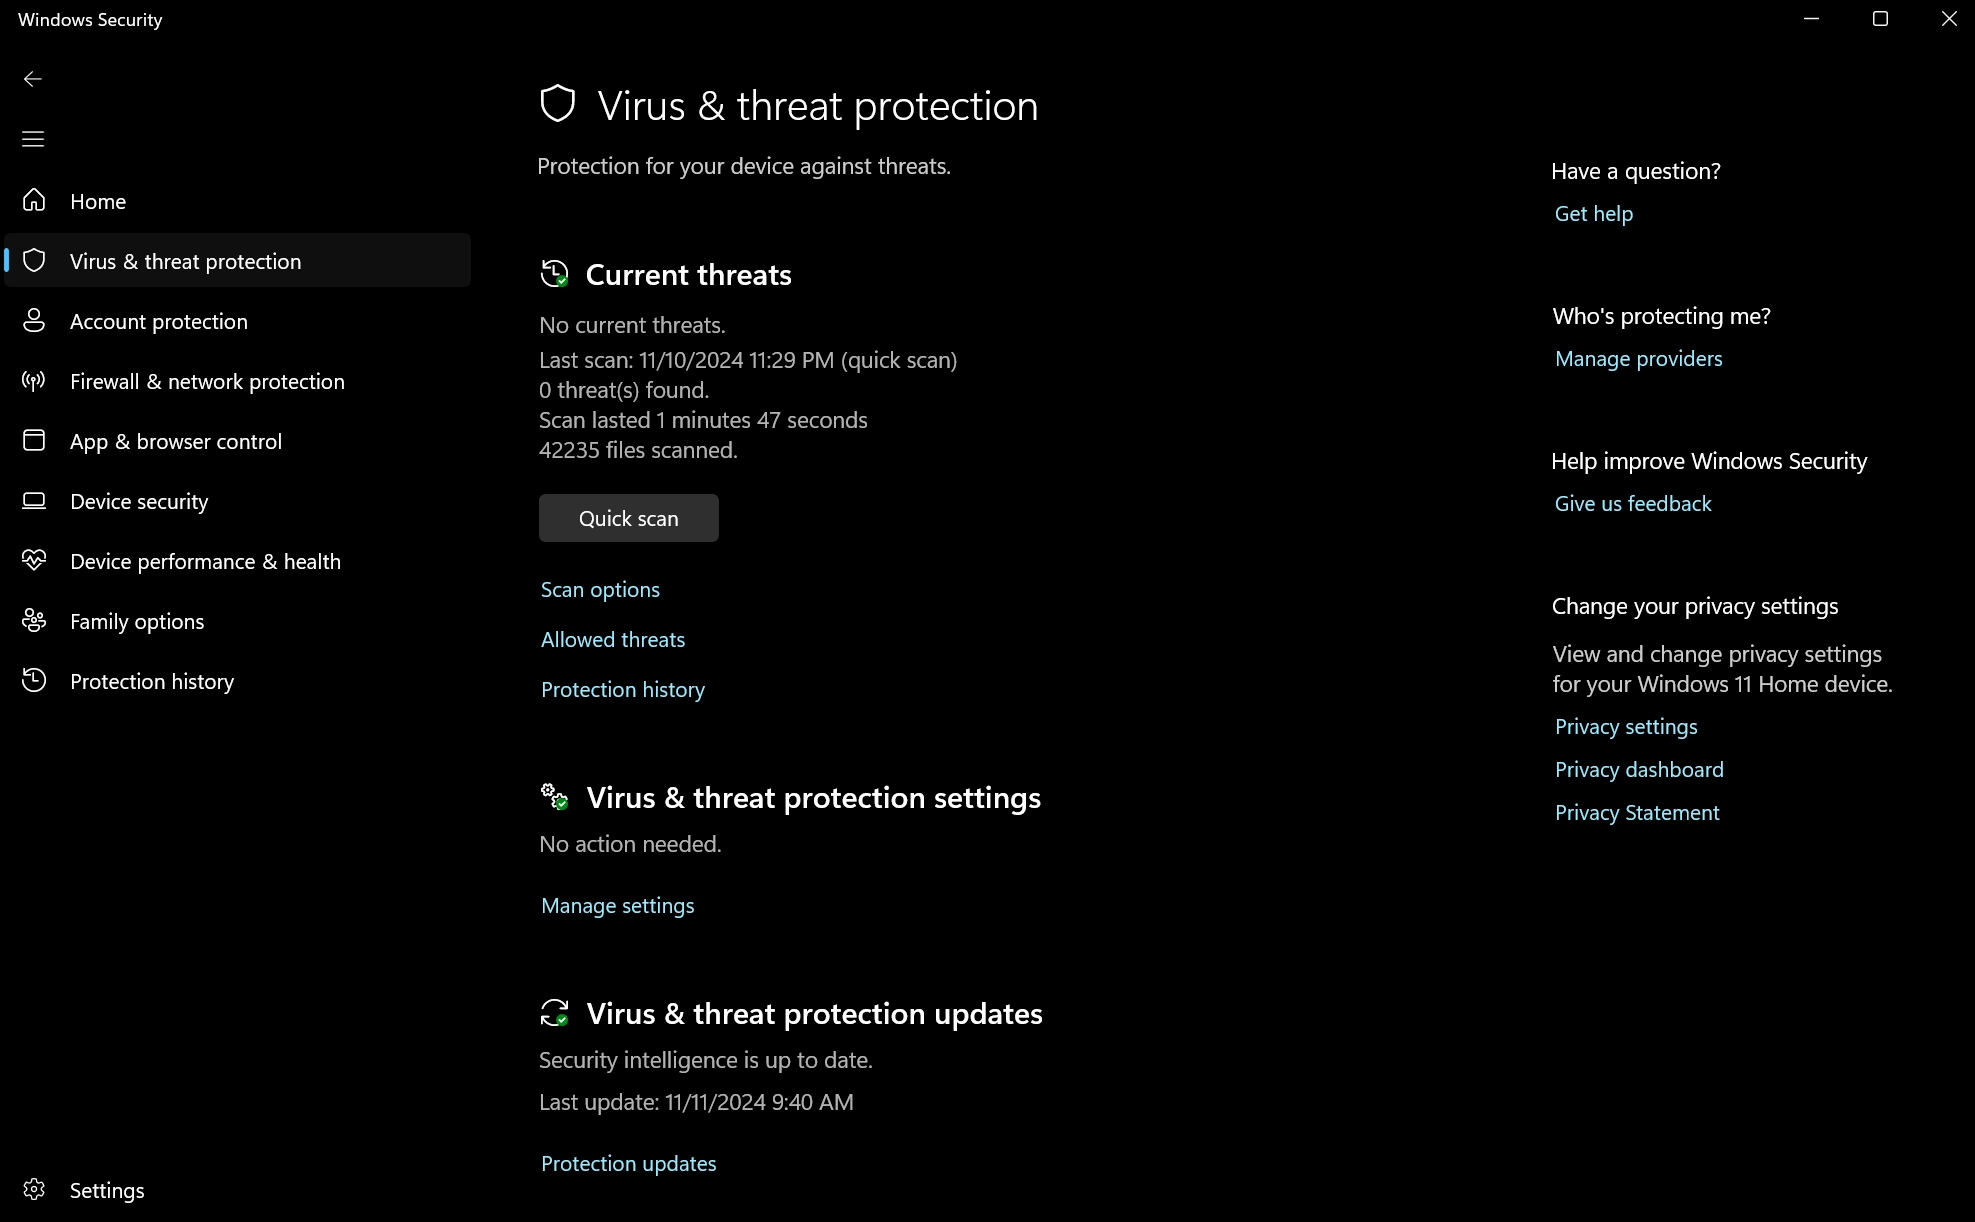
There are countless viruses and malware that can negatively affect your PC’s performance, and some may even use your system’s resources to benefit from it, such as using it for crypto-mining. Detecting and removing those will immediately improve your performance and may even result in lower temperatures.
You can start by doing a complete scan using the Microsoft Defender, which comes pre-installed with every Windows version. Although this antivirus software used to be pretty bad at protecting your system, nowadays, it is extremely good at detecting and automatically stopping malicious files from hurting your PC – but that doesn’t mean it can detect everything.
Using third-party antivirus software may also decrease your system’s performance, so what you want to do is simply use one to test that everything’s clean and safe, and then remove it. Malwarebytes is by far one of the most popular and best choices when it comes to detecting and removing malware. Simply download it, proceed to install it, and do a complete scan to make sure you don’t have anything “weird” sitting around in your Windows files.
4. Uninstall all the crapware (not what you think)
If you have a powerful gaming beast, you won’t have any issues with Microsoft’s pre-installed crapware. You know, those programs and apps that you’ll never use but they still exist among the ones you do? Well, the less you have the better for your gaming experience, and let me tell you, Microsoft has a lot of bloatware ready to be removed.
Now, while you can remove most of those apps from the Settings page, you’ll probably leave behind some junk data files, and some pre-installed apps won’t have the option to be deleted. To avoid that, you can use freemium tools such as the IObit Uninstaller, which will give you the option to delete everything with a single click.
To me personally, there’s a huge list of apps that I delete with IObit Uninstaller each time I format my PC or using a new one. Here’s a few apps that you can easily uninstall from your Windows PC:
- Alexa
- Recorder
- Maps
- Clock
- Phone Link app
- Snipping Tool
- Microsoft OneNote
- Microsoft To Do
- Xbox Live (and all Xbox apps)
- Movies & TV
- News
- Weather
- Microsoft Teams
- Microsoft Paint 3D
By the way, you can find all of those apps available for free in the Microsoft Store. Once you removed all the apps that you don’t need, simply restart your PC.
5. Install the latest drivers
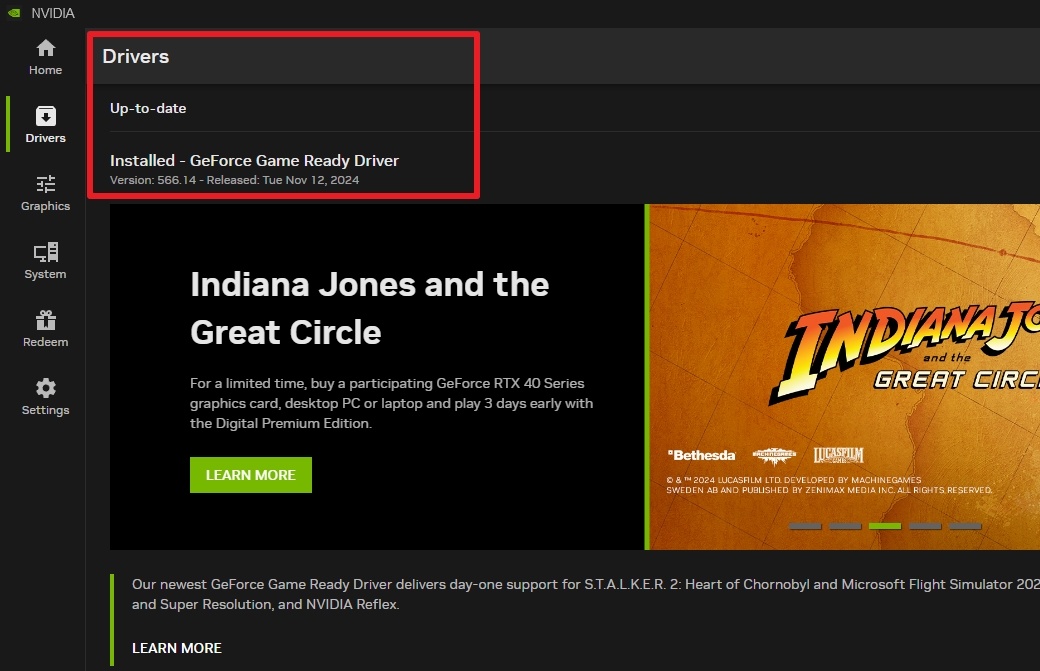
Making sure that you have the latest drivers installed is crucial. Unfortunately, many people think that Windows Updates has already done that, and they don’t need to proceed with any more steps, but in reality, that isn’t always the case. It’s important to manually check if you have everything in their latest version and you don’t miss any necessary components.
For Intel-based systems, I will highly recommend to download and install the Intel® Driver & Support Assistant, which is a lightweight and simple tool that scans your system’s drivers and notifies you if you have outdated Intel drivers.
NVIDIA also provides its own app that can automatically download and install the latest updates of your graphics cards, and it’s called NVIDIA App. You can also manually search and download the latest drivers of your NVIDIA GPU, but they will also download the NVIDIA app, so why go through the trouble?
If you’re an AMD owner, head over to the Drivers and Support for Processors and Graphics page to download your latest drivers.
But that’s not enough, it’s also important to make sure that you have both the latest drivers of your Motherboard and your BIOS/UEFI. To do so, simply head over to your motherboard’s official website and search for your model.
How to check in Windows your BIOS/UEFI version:
- Press
Windows + Rto open the Run dialog. - Type
msinfo32and press Enter. - Look for the BIOS Version/Date field. The version and release date will be listed here.
Theoretically, you could also use software to do all of that automatically, such as a Driver Booster tool, but those kinds of software can also break your system, so usually, the manual way is preferred as the best choice. Having another tool installed is also not recommended when we try to keep our system as clean as possible so it can perform at its best.
6. Disable the Windows effects
Some people have noted that they saw an increase when they disabled the Windows effects, others said they saw no difference whatsoever. You can try and see if it made any difference for your end, and you can do that with two ways, depending on your version.
Disable the transparency effects in Windows 11:
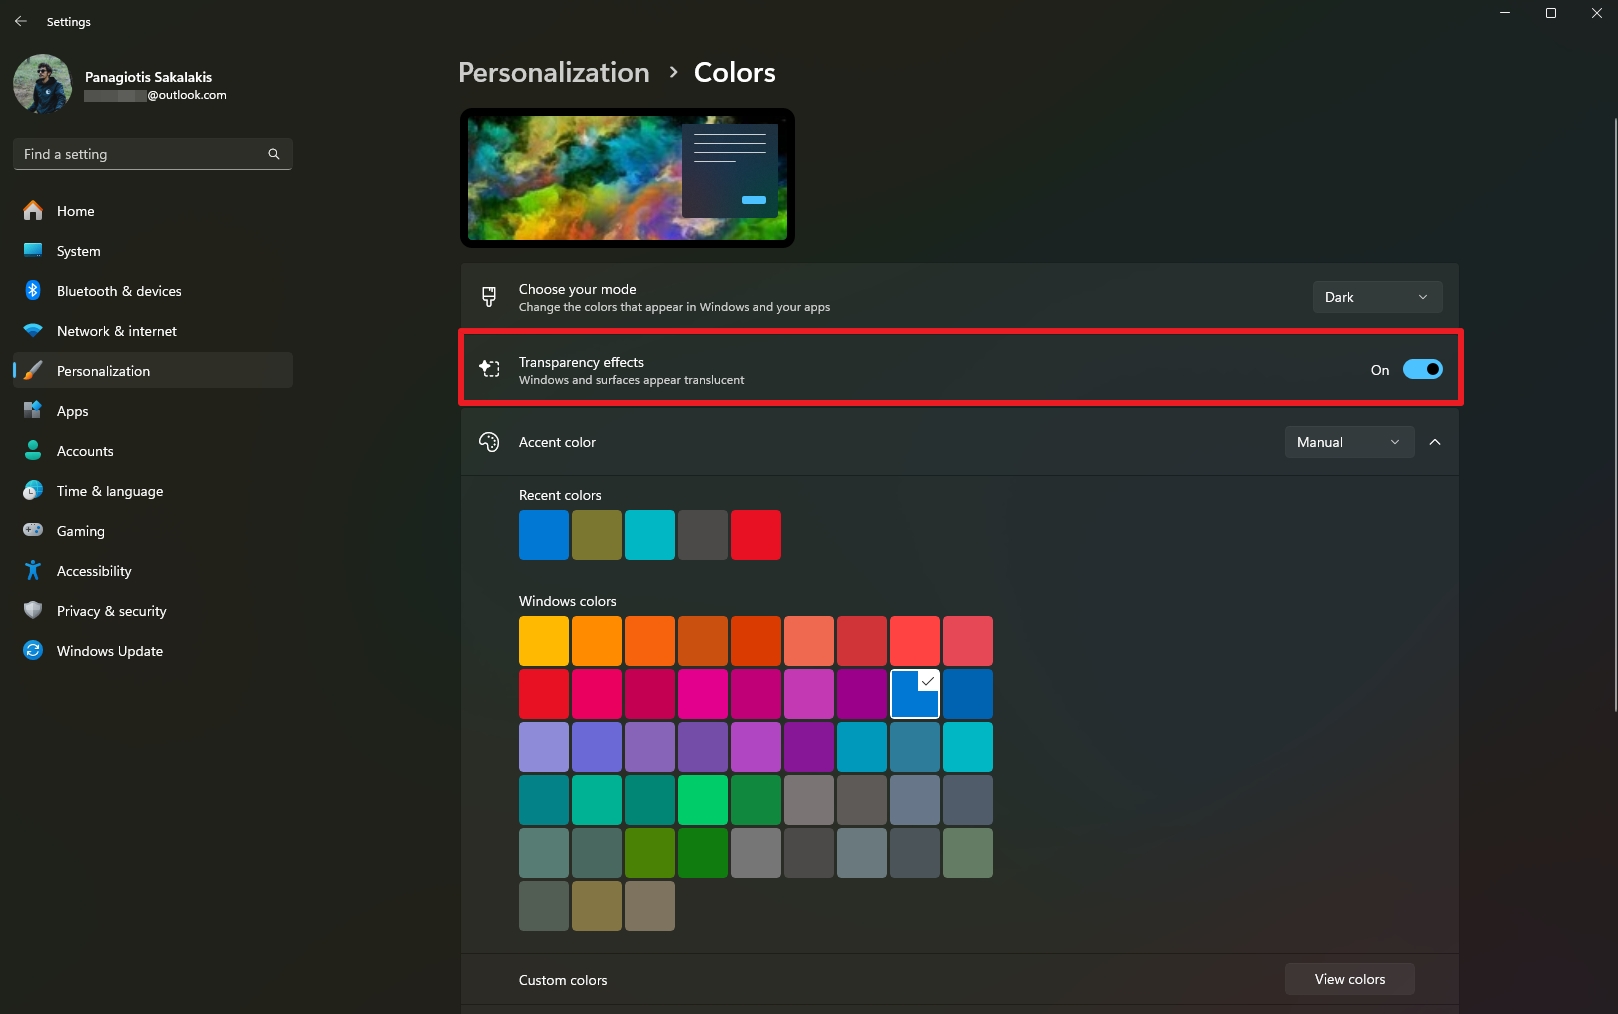
Those transparency effects are only available in Windows 11 through the Settings app.
- Open the Settings.
- Go to the Personalization tab.
- Click on Colors and disable the “Transparency effects“.
Adjust Windows 10 & 11 for ultra performance:
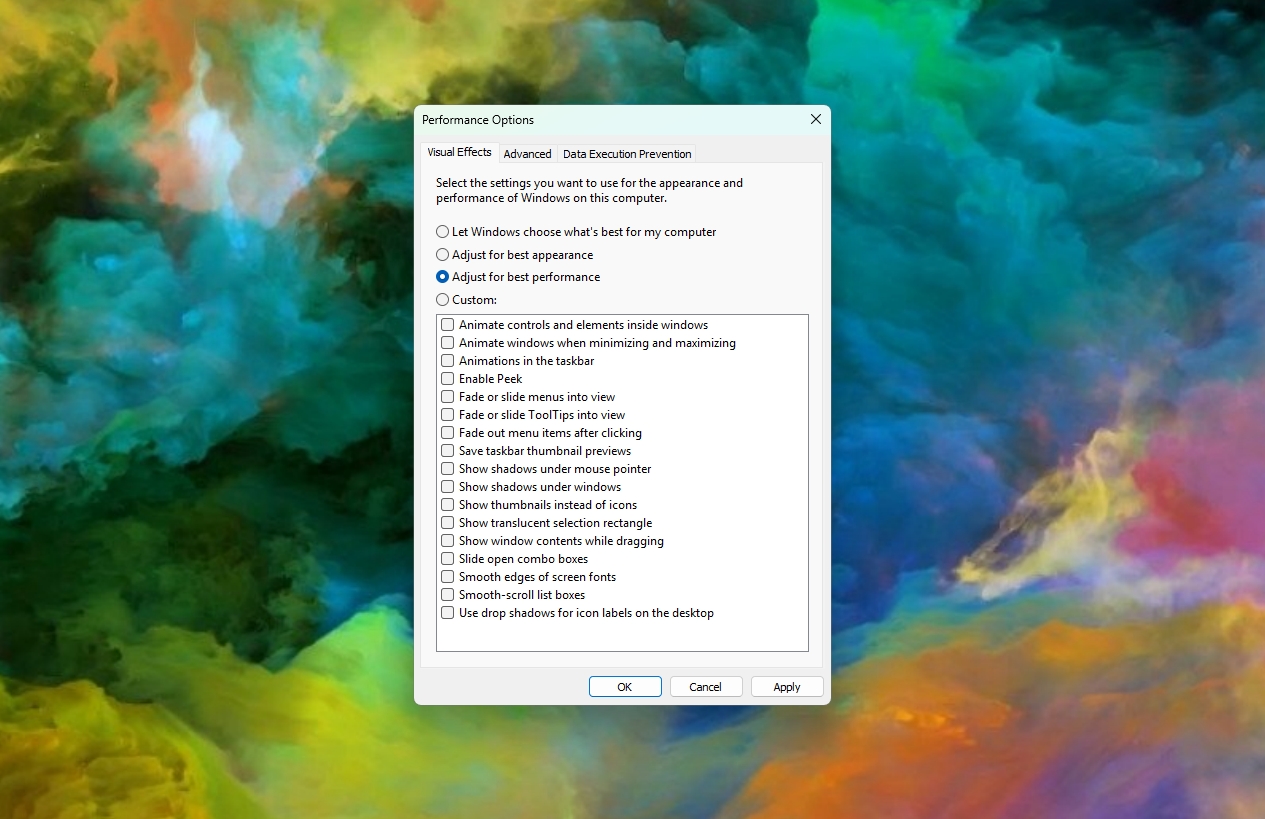
The performance adjustment settings are available both for Windows 10 and Windows 11 users:
- Open the Start menu and search for “Adjust the appearance and performance of Windows“.
- For best performance, go with “Adjust for Performance“. Some things may look a bit ugly while navigating the operating system, but you can enable each option you want to keep manually.
If you don’t see performance improvements after doing those changes, you can always revert them by following the same steps.
7. Disable startup programs and stop background processes
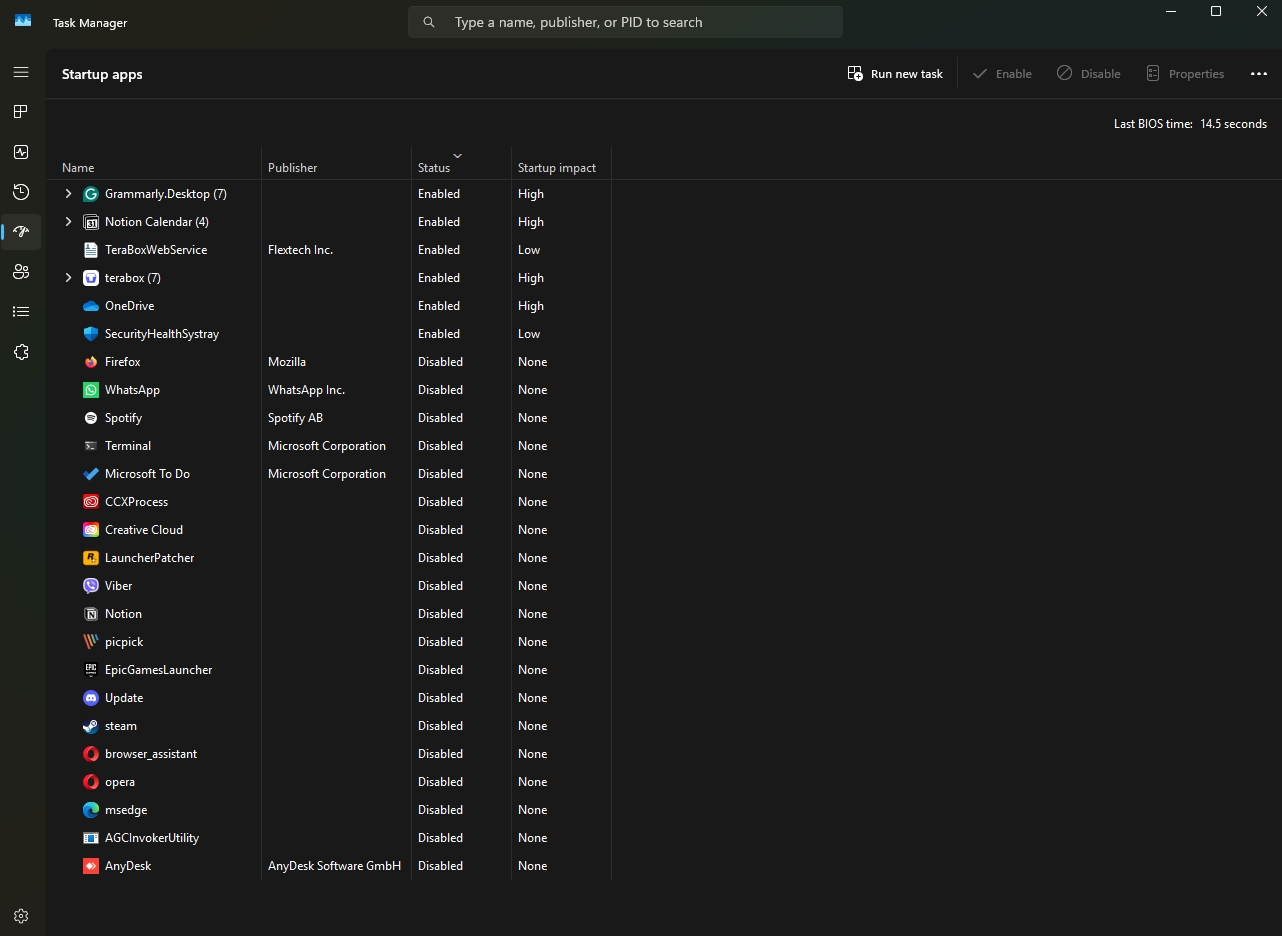
The biggest problem when it comes to gaming performance in Windows? Background processes, services, and apps that are constantly running and using our system’s resources – which results to lagging in games. The second biggest problems? Manually closing all the unnecessary software each time you restart or shut down your computer.
Thankfully, we can solve both of those problem with a few simple ways. The simplest way is to start by disabling most of the apps that we don’t want to start when Windows loads up. To do so, follow the steps provided below:
- Right-click on the Start menu and launch the “Task Manager“.
- Head over to the “Startup apps” section.
- Disable all the apps that you don’t want to start automatically with Windows.
When it comes to a bunch of things running in the background, you can go on another level by using the Autoruns (Sysinternals) tool. Simply run Autoruns and it shows you the currently configured auto-start applications as well as the full list of Registry and file system locations available for auto-start configuration.
8. Disable tips, notifications, and pop-ups
I can’t even count the times that while I was playing a game, a Windows notification popped into my screen, and the game suddenly started lagging. Other times, I couldn’t see my skills, so I was unable to properly play the game, and all of that was for a new update notification, someone sending me a friend request on Facebook, or whatever.
You can disable all the unnecessary notifications and those prompts and avoid getting interrupted again in future gaming sessions. By the way, Windows has a “Do not disturb” option that you can enable whenever you don’t want to get new notifications (they will still be available in the “Notifications Panel” though).
How to disable tips and notifications in Windows:
You can either disable all the notifications for all apps, or only exclude the ones that you don’t care about, or never opening.
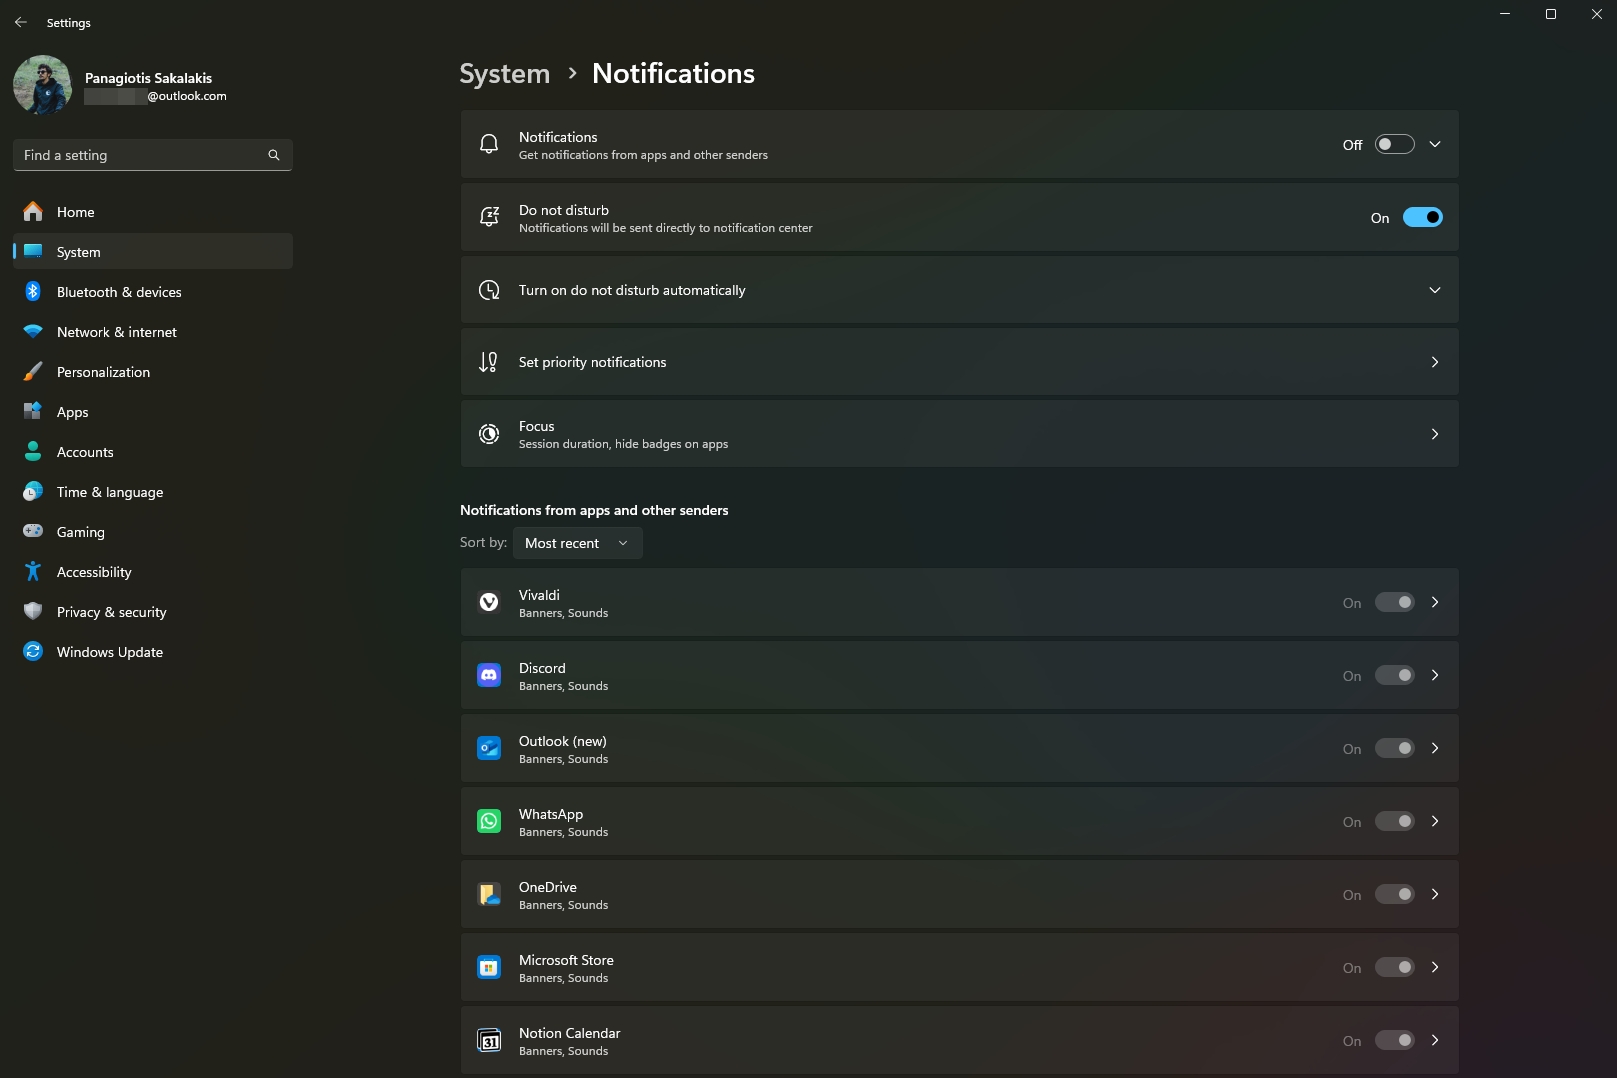
- Open the Settings page.
- Navigate to System and click on Notifications.
- Turn off the Notifications.
- Scroll down to “Additional Settings” and disable them too.
How to disable the File Explorer’s notifications:
You can also disable the provider notifications through the File Explorer with a few simple clicks.
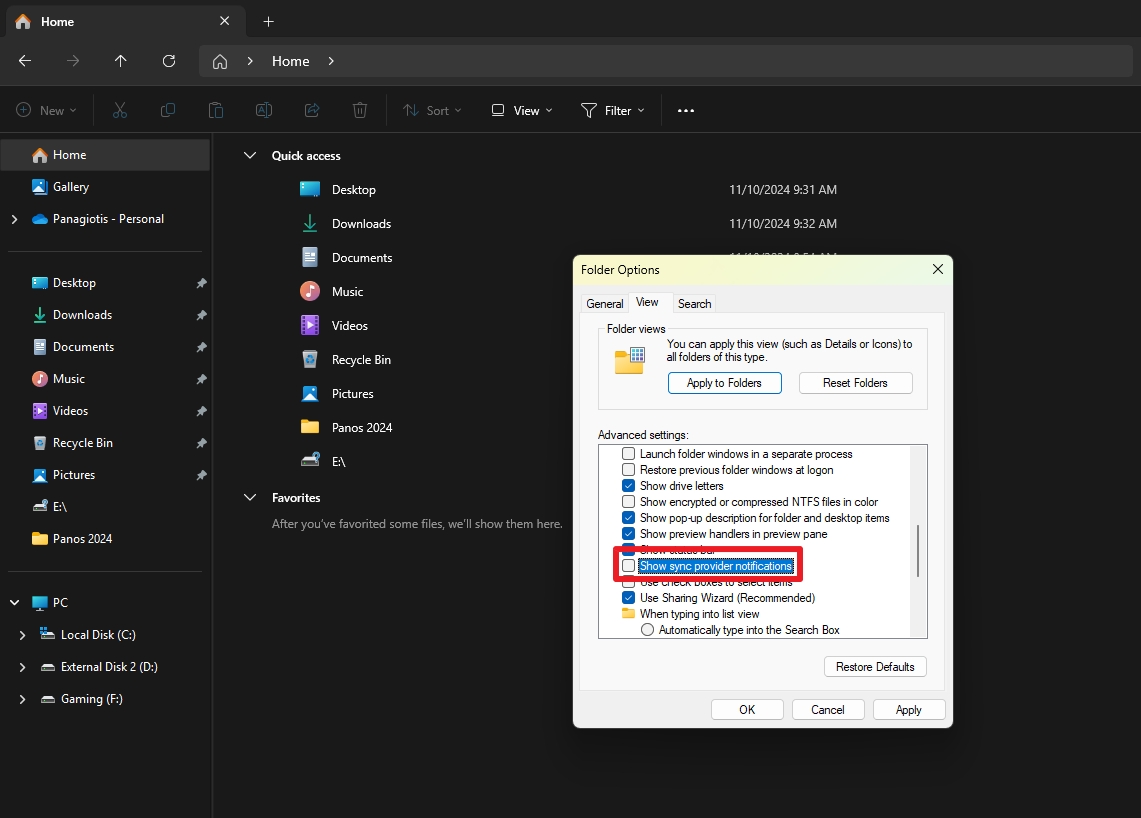
- Open the File Explorer.
- Click the View tab and select Options.
- In the Folder Options window, go to the View tab.
- Uncheck Show sync provider notifications.
You can always follow the same steps to undo those changes.
9. Check for overheating issues
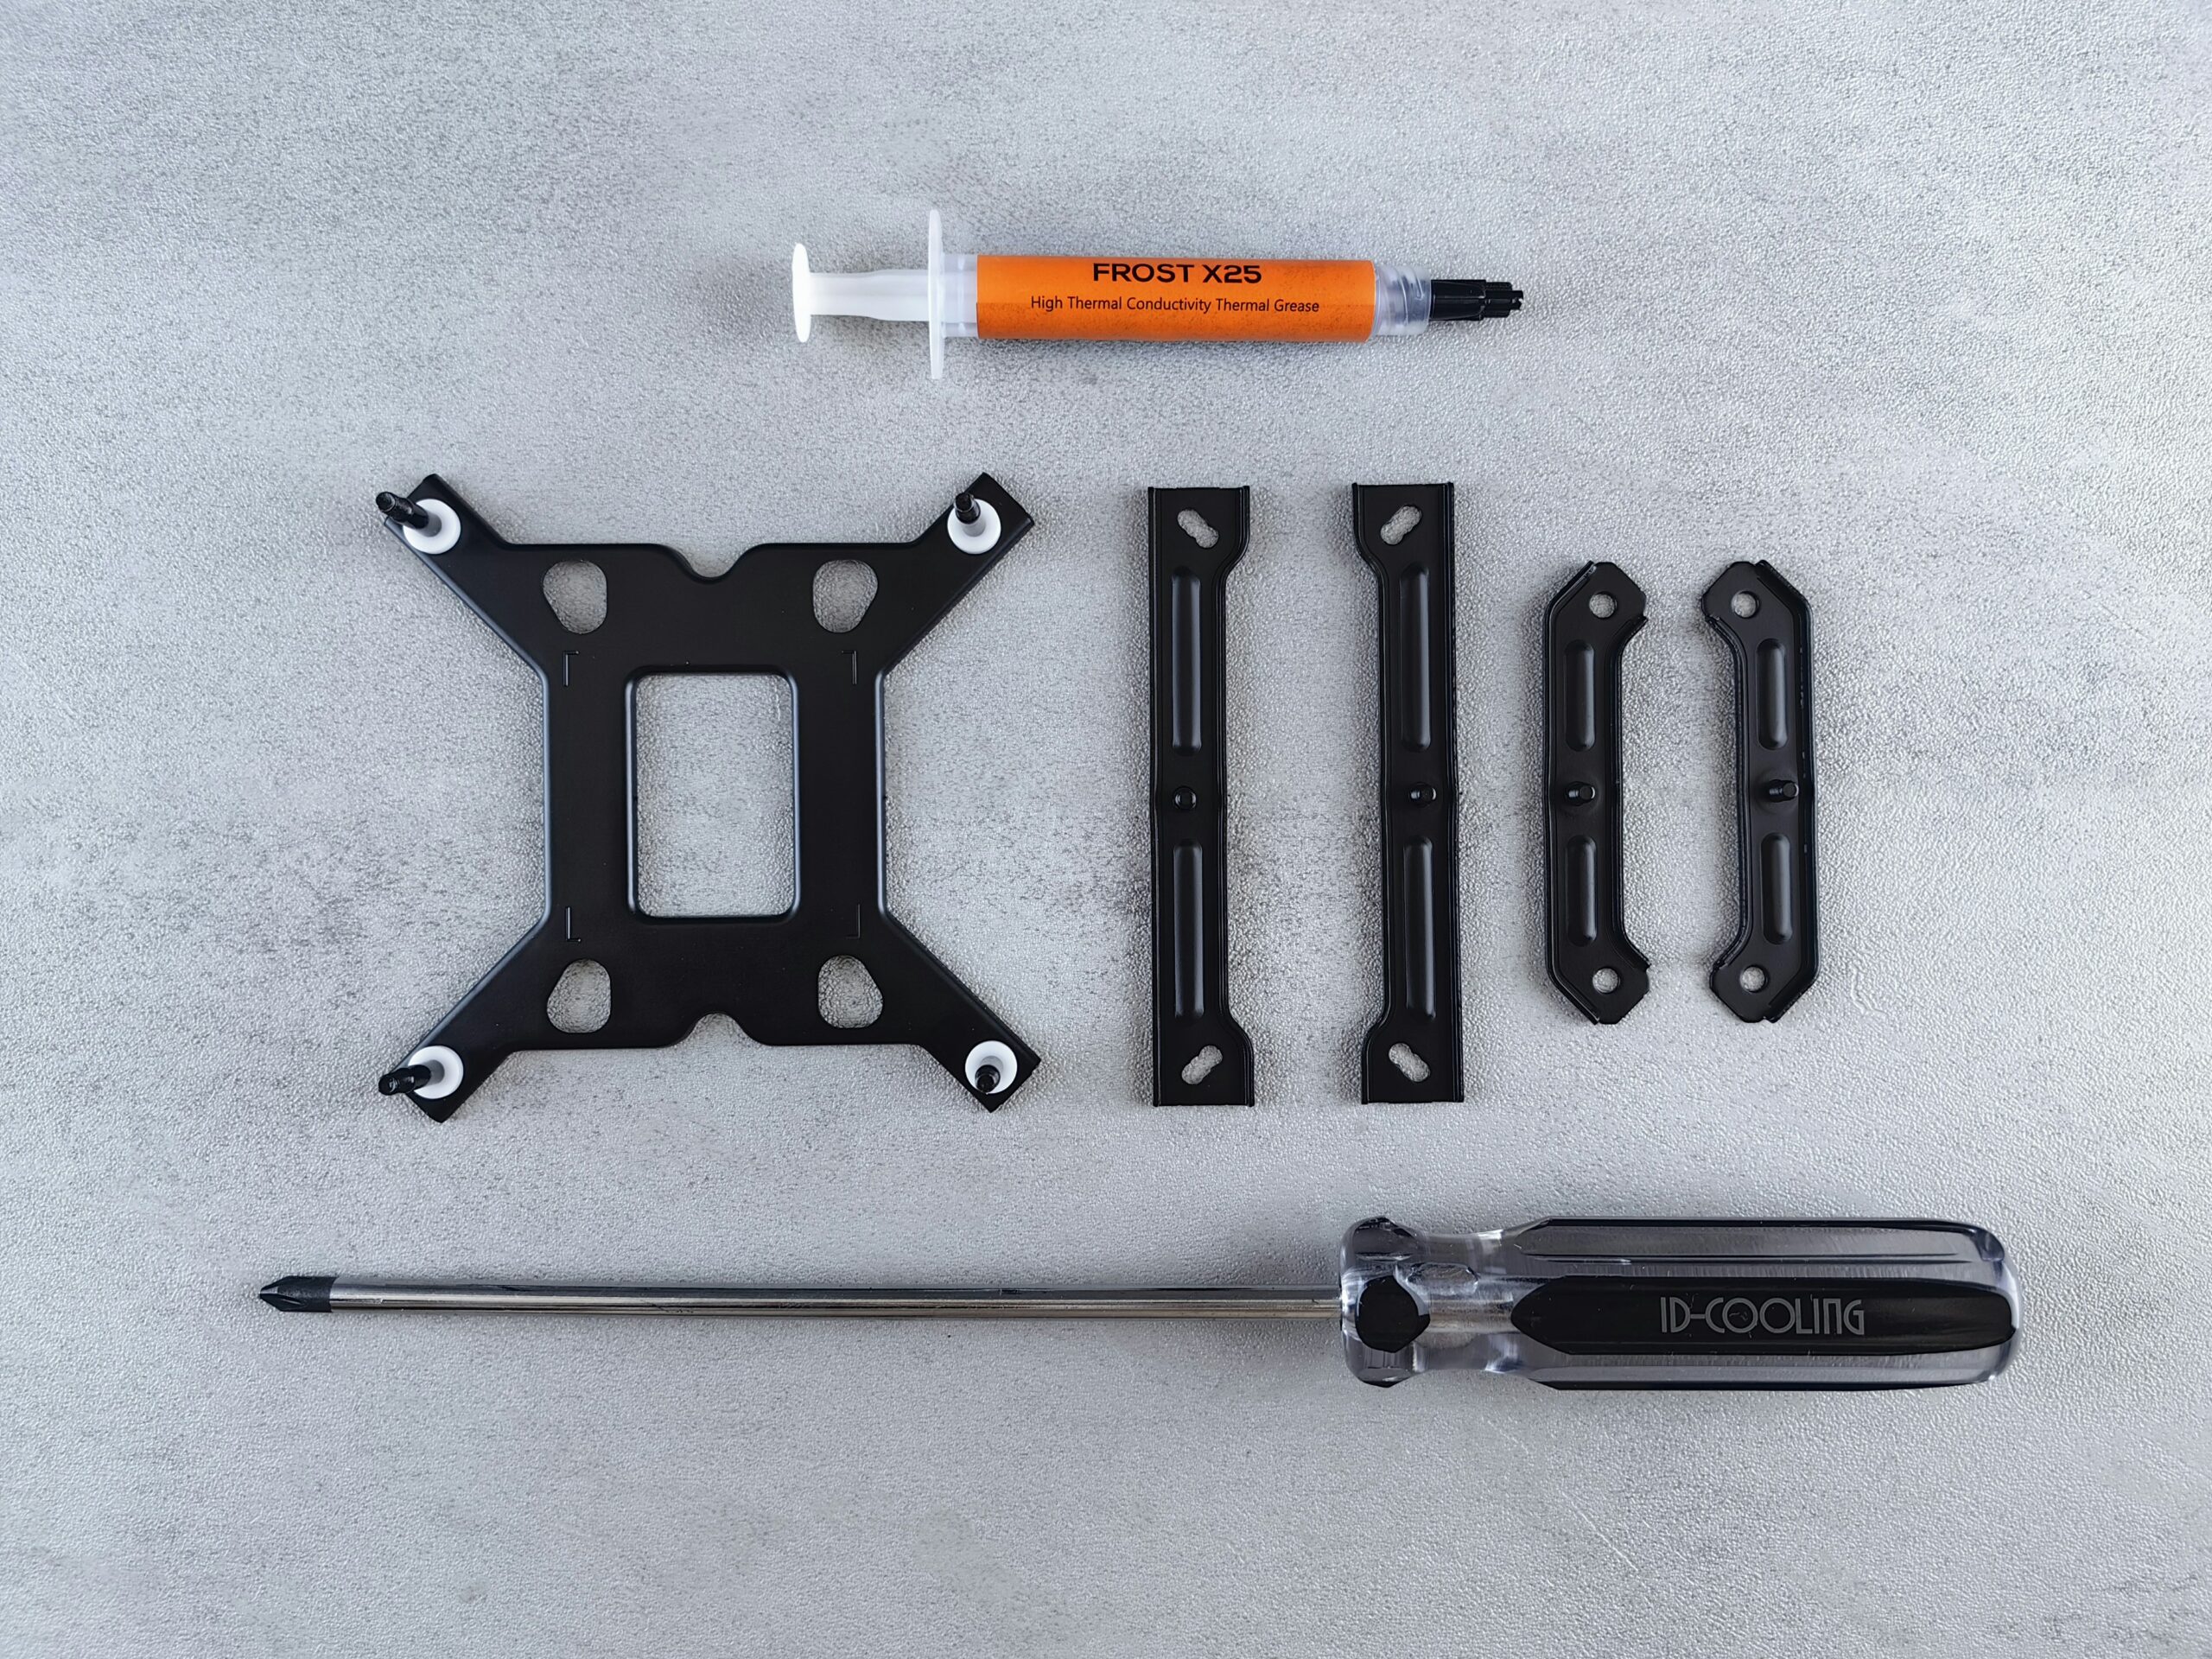
The thing that most people don’t understand is that overheating causes low performance. It’s that simple. It’s science. If your desktop PC or laptop is full of dust, I will highly recommend you clean it up, or give it to professionals to take care of it for you.
Where’s what you need to know:
Let’s start from the very basics and why overheating is usually causing performance issues:
- Dust: Dust can clog fans and heat sinks, reducing airflow and preventing heat from escaping.
- Thermal paste may have degraded: Replace the thermal paste on the CPU and GPU if it’s old or improperly applied.
- Overclocking: Overclocking your CPU or GPU increases heat output. Reset the BIOS/UEFI to default settings to disable overclocking. If you wish to overclock, ensure you have adequate cooling in place, meaning that you’ll need a proper upgrade.
Most of the time, cleaning the dust from the PC or laptop and replacing the thermal paste will do the trick and lower temperatures should be seen immediately. If you have already done that, then you may experience a hardware component that possibly started failing and needs replacement.
When your computer begins to overheat, the CPU and GPU automatically throttle their performance. This built-in safety mechanism reduces resource usage, helping to generate less heat and prevent further damage.
How to check your PC’s or Laptop’s temperatures
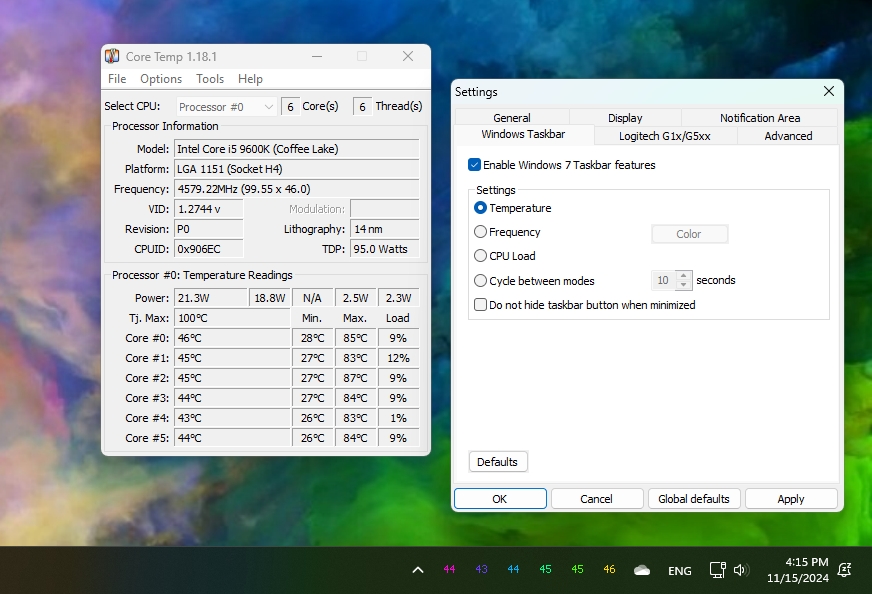
If you’re a Windows user, Core Temp is by far one the best, most lightweight, and free tools to check not only your CPU’s temperatures but also important information that you may need and a way to constantly display them in your taskbar.
If you’re gaming on Linux, there’s a huge list of apps that you can use to monitor your CPU’s and GUP’s temperatures, including lm-sensors, Psensor, Hardinfo, Glances, CoreFreq, i7z, GNOME System Monitor, Conky, TLP with powertop, and KSysGuard (for KDE), just to name a few.
10. Use Winaero Tweaker to tweak Windows
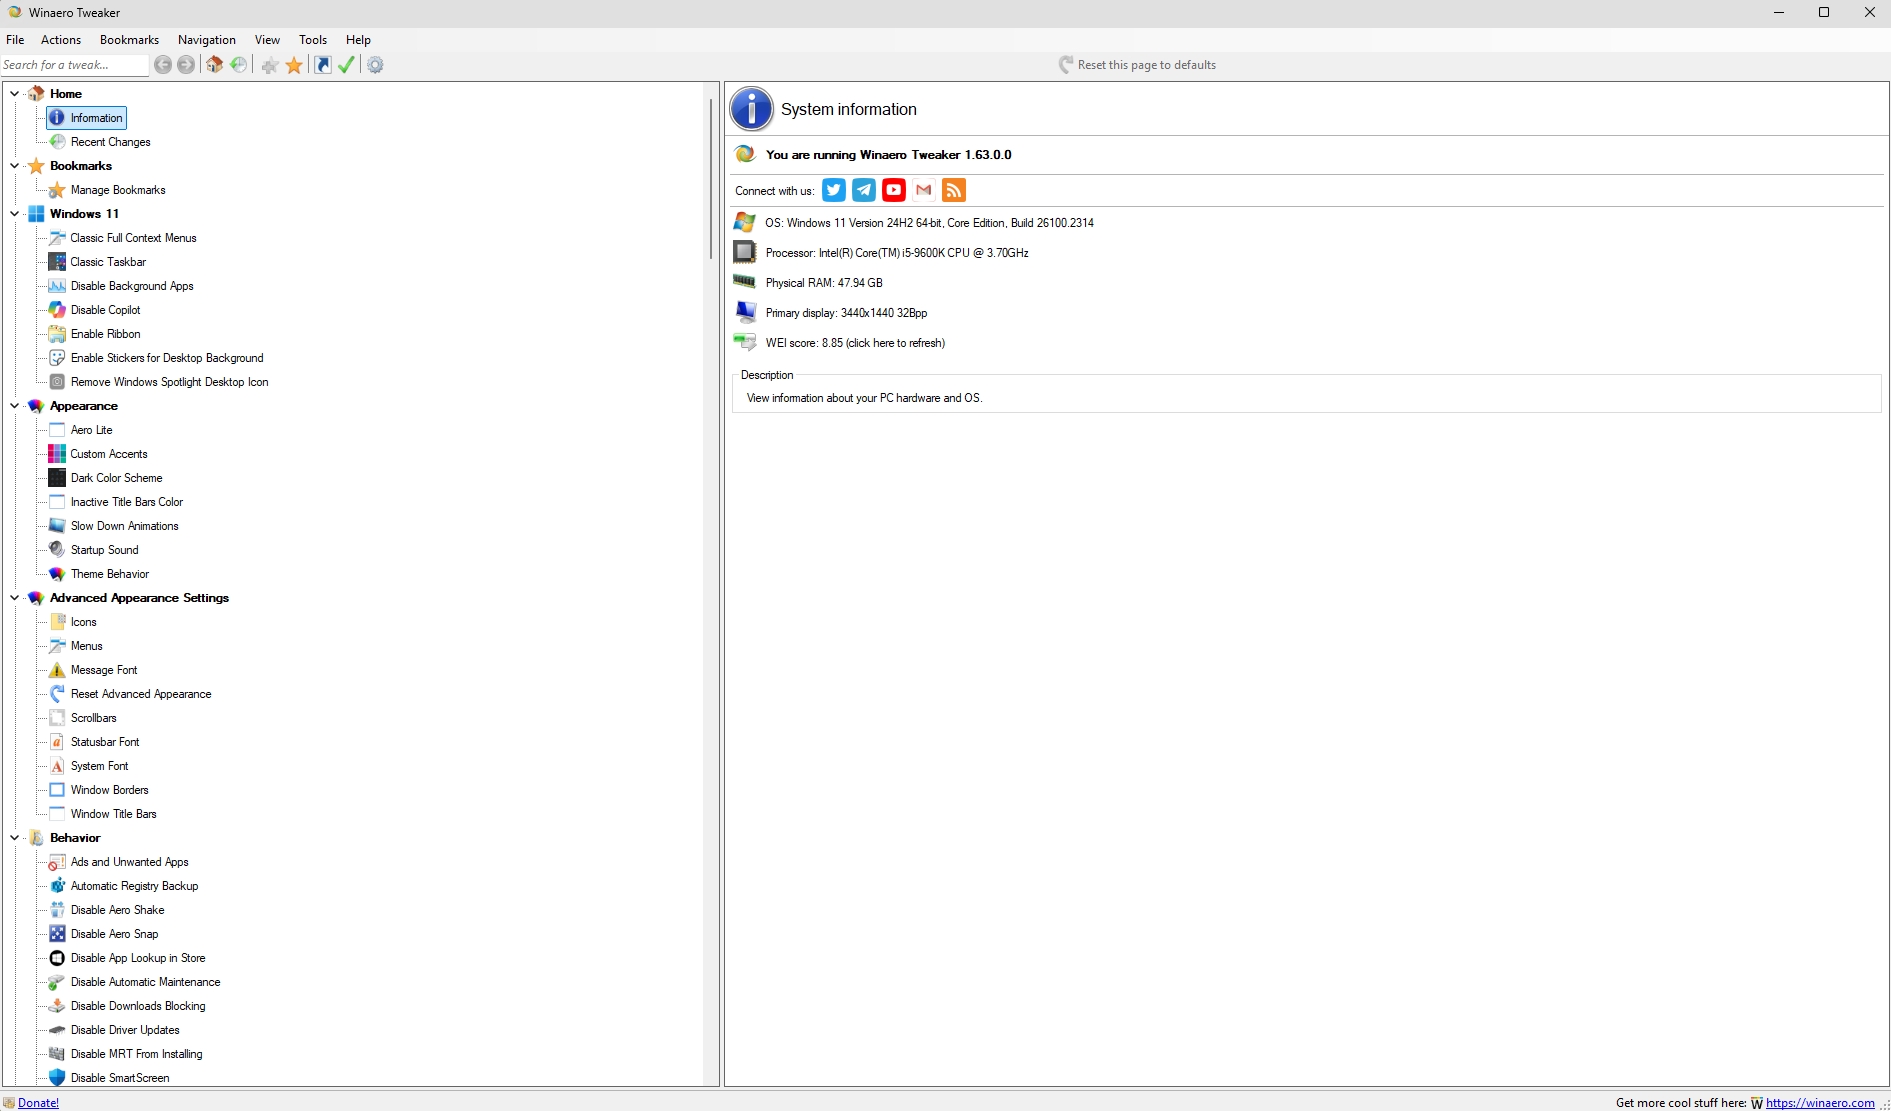
There’s a lot to say about this little tool, made by a guy called Sergey Tkachenko. First and foremost, it’s a freeware app, and its website it’s ads-free, scripts-free, and web tracking-free, which is a nice start.
When it comes to Winaero Tweaker, it’s a software that you can install in most versions of Windows (currently available for: Windows 11, Windows 10, Windows 8, and Windows 7), and it lets you tune your operating system.
But why is Winaero Tweaker so important? Well, that’s because it simply lets you disable almost anything you don’t need to be running in the background. And yes, the list is pretty much huge, so it may take you a little time to set it up the first time, but it will be well worth it in the end.
I won’t bother you with all the options, features, and services that you can easily disable using this tool, as they have already included some of those on their official website. The point is, that the fewer apps and services running in the background, the better overall casual surfing and gaming performance you’ll be getting.
11. Upgrade to an SSD and add more RAM
I’ve seen a few people that told me they had performance issues. When I asked them to send me a few screenshots using the Speccy app, I couldn’t believe that they were still using a slow and old HDD disk with modern hardware. SSDs and M.2 SSDs are the future and most games nowadays are getting build with those speeds in mind.
If you haven’t already done that, replace your old HDD disk with a newer SSD or M.2 SSD (the latter if your motherboard supports it), and you should experience an immediate difference in the performance and smoothness of your PC or laptop. If you want to upgrade that smoothness even more and be able to run more apps at the same time, you can increase your RAM, which is another important factor for overall performance.
Laptop owners should also check how much RAM they currently have, and if their model can support additional RAM.
12. Configure your graphics card
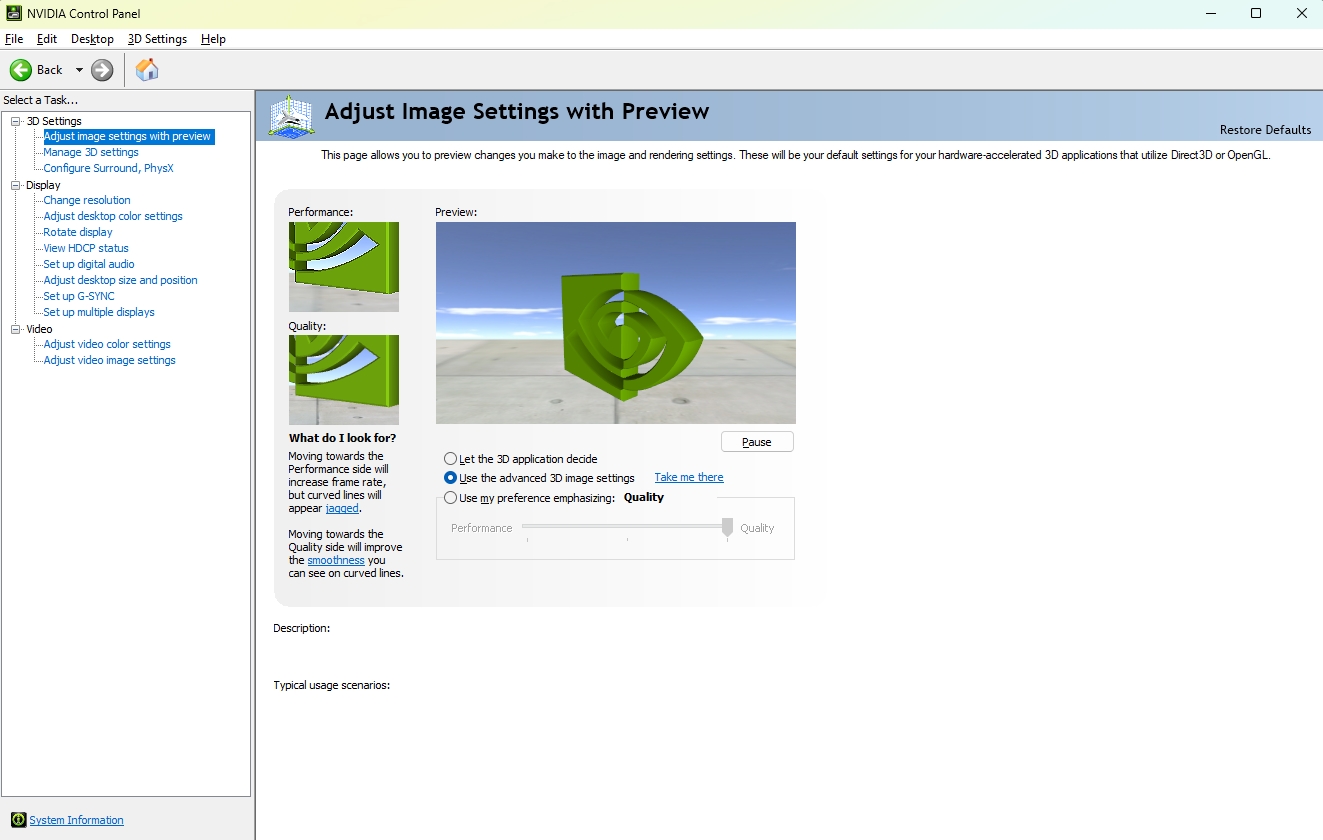
There were many times that I had to launch NVIDIA’s Control Panel to make adjustments in order to increase the FPS. Specifically for Call of Duty, Grand Theft Auto V (GTA 5): Online, and Dying Light 2, and I’ve seen a great overall performance in all of them. Although I haven’t tested those changes in alternative software for Intel-based or AMD-based cards, they usually provide the same options and features.
The best way to get the latest tweaks and tips for adjusting your graphic card’s settings for gaming is to simply search on YouTube for “NVIDIA control panel best settings for gaming” (replace the “NVIDIA” with “AMD” or “Intel” based on your system’s hardware). If you’re an NVDIA owner looking to increase your FPS, here’s a quick and easy to follow guide.
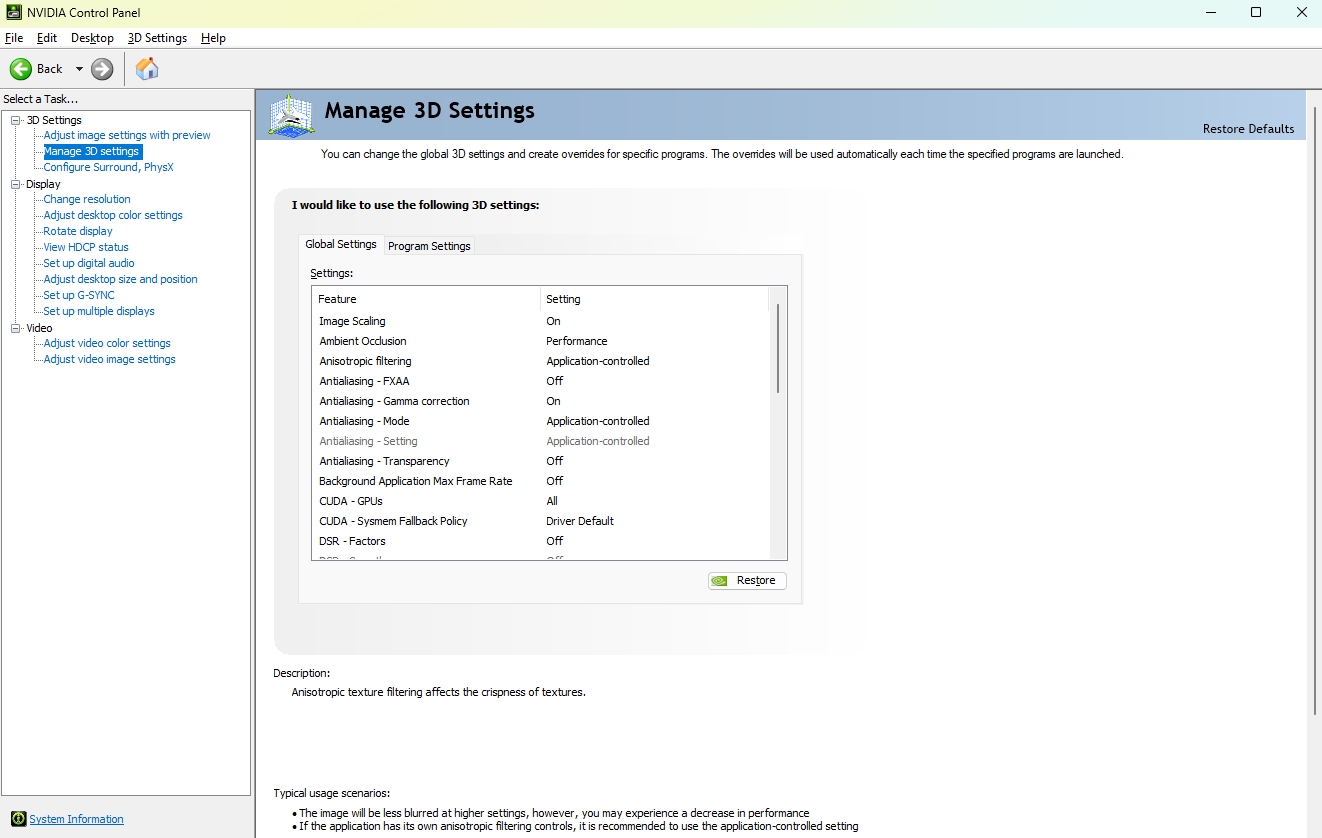
There are specific settings that can boost your PC’s performance and increase the FPS, such as Ambient Occlusion, Anisotropic Filtering, Low Latency Mode, Power Management Mode, and more. I’ll suggest making changes and re-checking your games, see what’s working and what’s not.
13. Replace Windows with a lightweight Linux distro
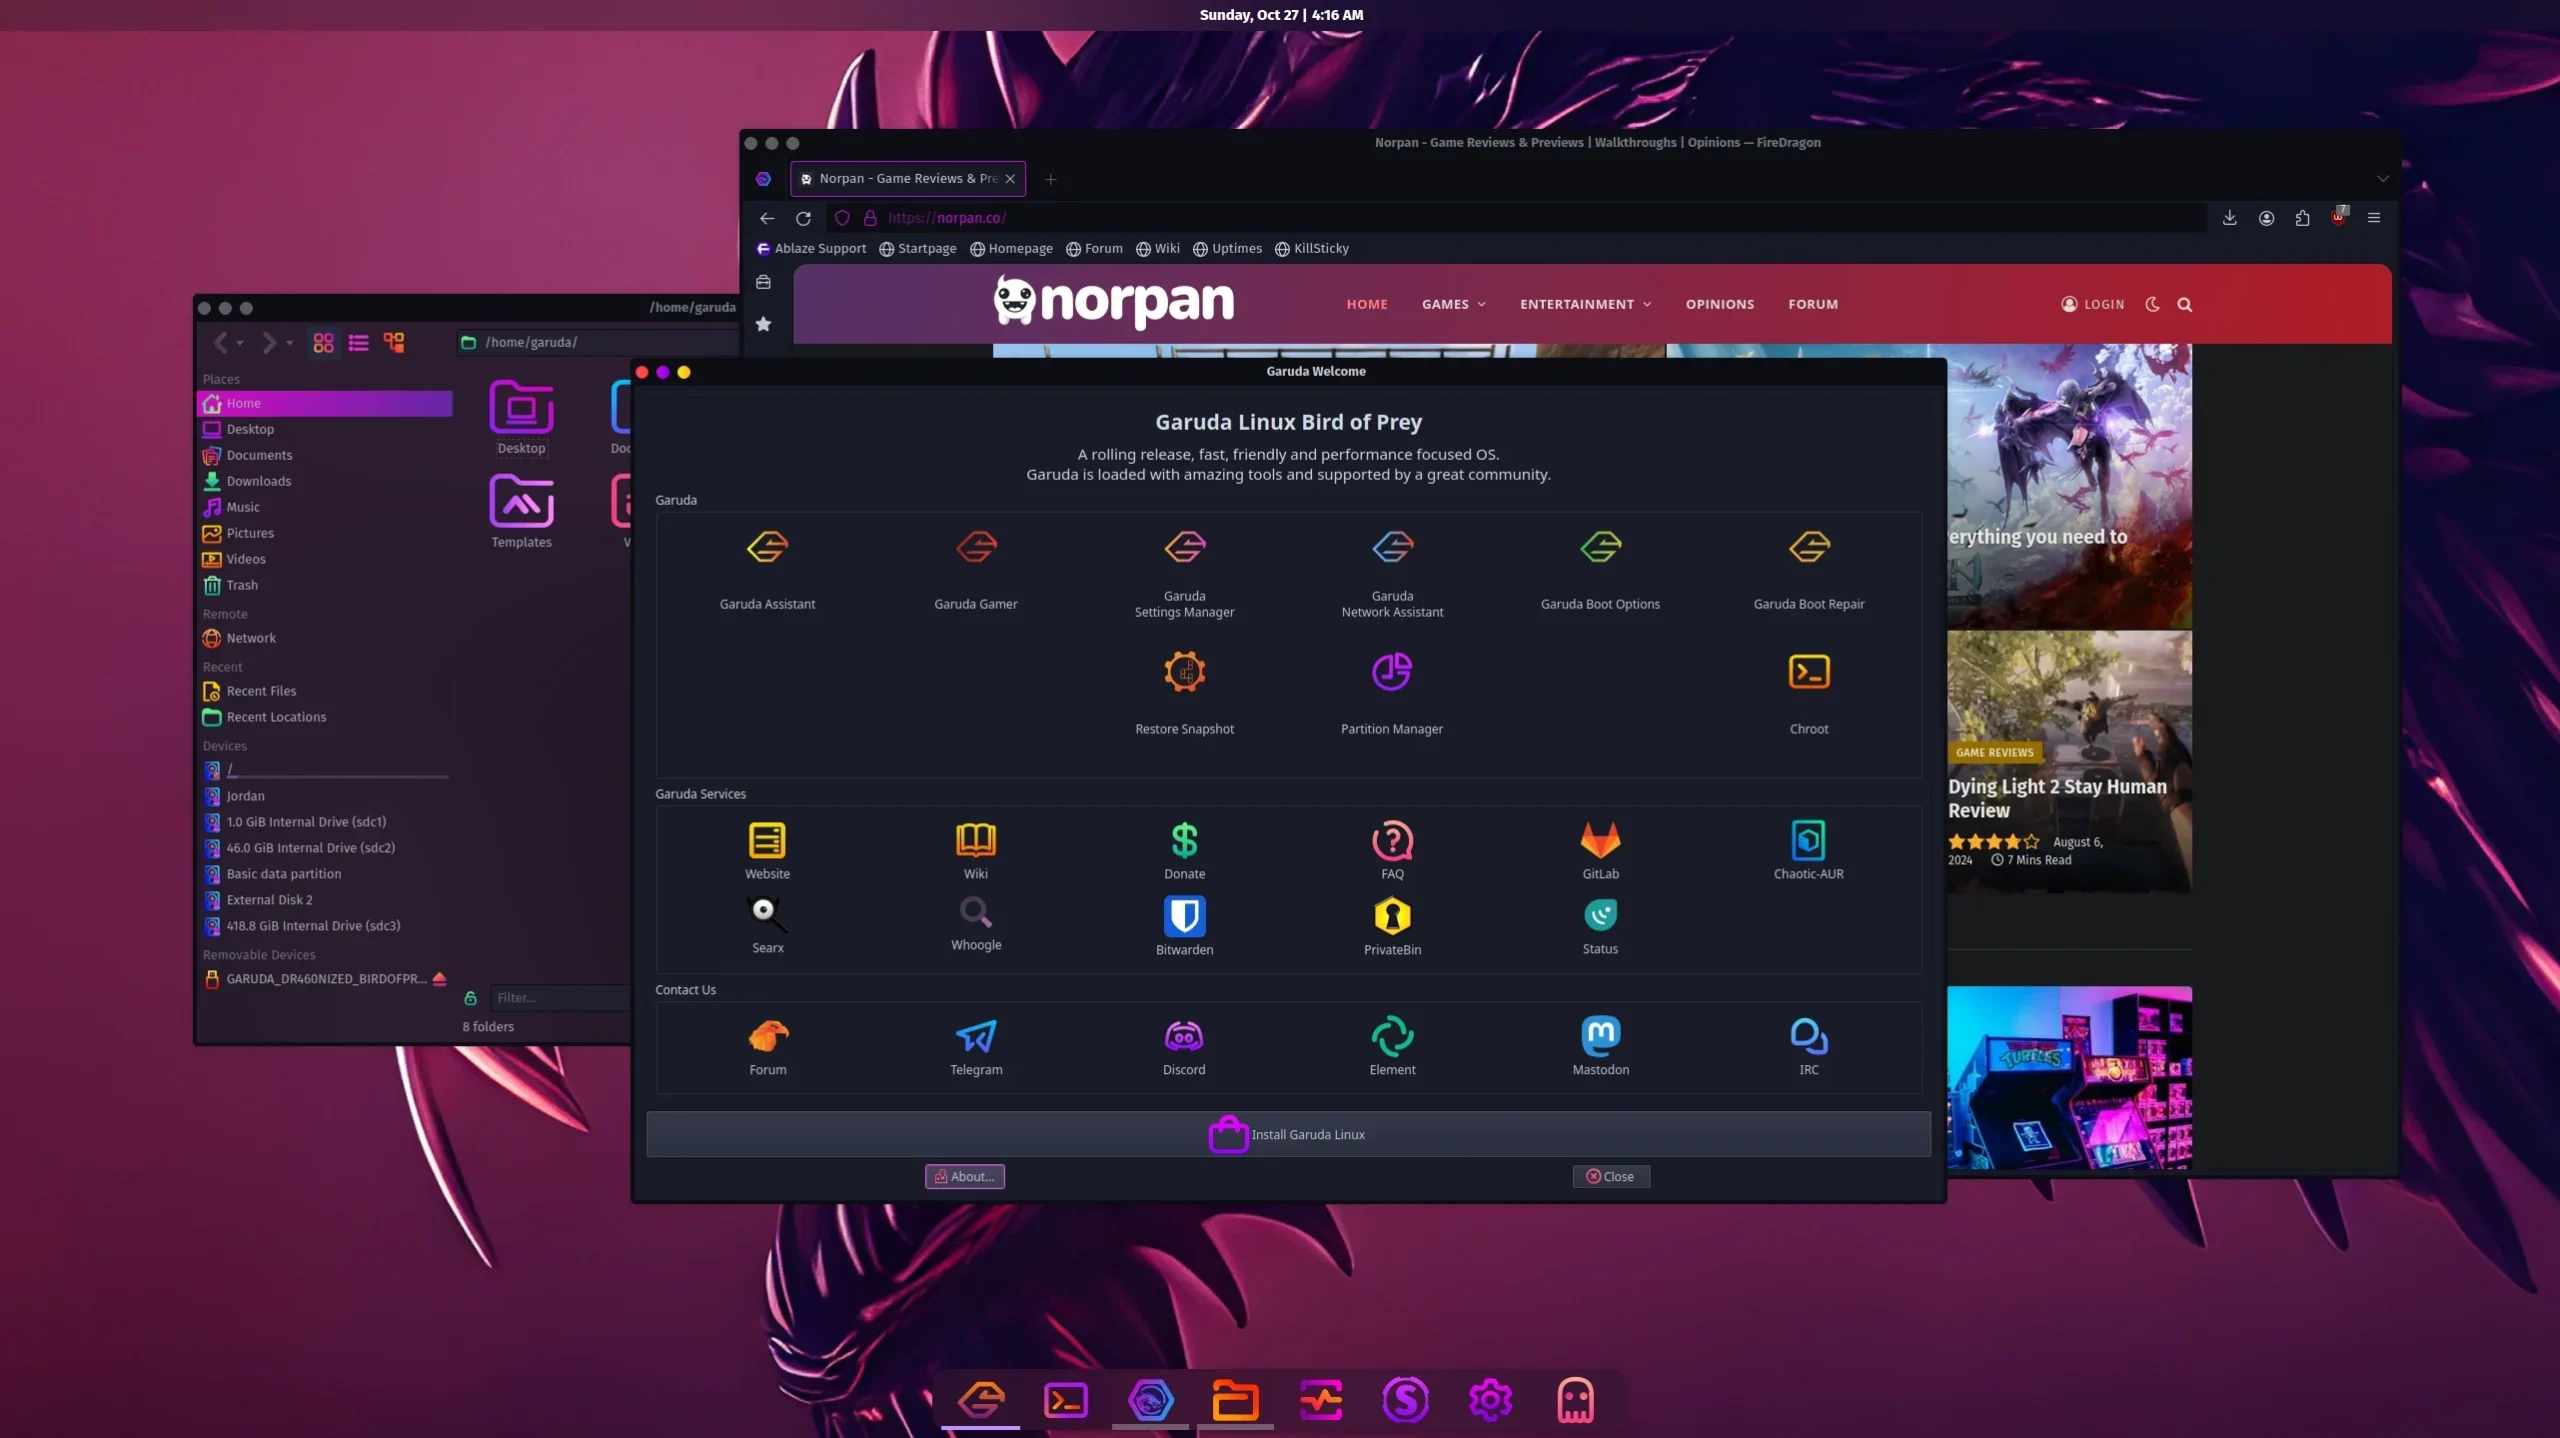
If everything fails, think about giving Linux a try, and installing a gaming-driven distro for a quick and out-of-the-box experience. Nowadays, it’s pretty easy and quick to install any Linux distribution, and even try multiple using a USB device, and without even installing them.
Check out my latest article on the best Linux gaming distros that you can try:
A lightweight Linux distro compared with a lightweight graphical environment (XFCE is a great example) may result in increased FPS and a smoother gaming experience. Check out my Gaming on Linux: A Beginner’s Guide to learn more about how to get started.
Did any of those changes and tools help you increase your system’s performance? And if so, which of them made the biggest difference? Let me know in the comments section down below.

