Whether you want to capture your best moments and share them with your friends, start a YouTube channel, or even live stream your gameplay on platforms like Twitch, there are many ways that you can easily record your games, and you can do that completely for free.
If you’ve seen our latest gaming videos on YouTube, we’ve been constantly recording the games that we play so we can later edit them and upload them. Before choosing which software we’ll be using, I took my time and checked the most popular free options and how well they performed.
I’ve tried the following apps in Call of Duty: Modern Warfare II, Grand Theft Auto V, Read Dead Redemption 2, Throne and Liberty, and many others. If they performed great with those games, let me just tell you that they’ll do their job just fine regardless of the title you’ll want to record.
The best settings for recording your gameplay
Let’s start from the very basics: Depending on your hardware you’ll have different options when it comes to recording your games. If you don’t have a strong CPU and lots of RAM, for example, you may see your videos lagging, in which case you’d want to lower some settings to get a better performance and smoother playback.
There are a few specific options that you’ll need to always look for:
- Resolution: Depending on your hardware’s capabilities and your monitor, you can record your games with a low 1920×1080 (1080p) resolution, or go as far as 3840×2160 (4K). The higher you go the more chances you got to see some lagging or shuttering, but if you have a strong PC, you won’t face any issues.
- Frame Rate (FPS): When it comes to frame rate, it’s the same principle as with your PC’s resolution: The higher you go, the smoother the video will be, yet more resources will be used by your software. For example, 60 FPS will result in a smoother recording than 30 FPS.
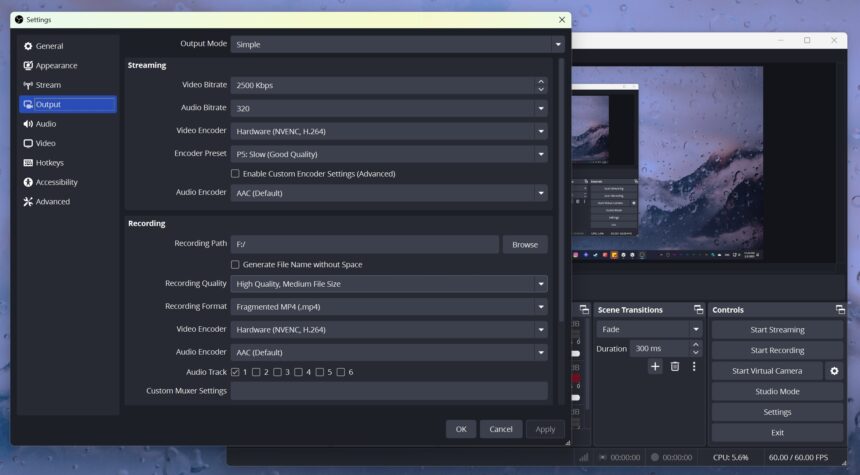
- Video Encoder: While most encoders nowadays will work just fine, anything that has the “NVIDIA” or “AMD” in it (depending on your hardware) should provide a boost in performance. If you see options such as NVIDIA NVENC or AMD VCE, use those.
- Audio Bitrate: They say that anything over 128 Kbps is fine, but I’d argue that you need at least 320 Kbps for clearer audio quality. In my tests I did see Audio Bitrate playing a big role when it comes to recording, so go ahead and increase it a bit.
- Video Format: If you want the best possible quality from your videos, recording them in MOV format should be your first priority. MOV is developed by Apple and it’s a less compressed format that provides higher quality for your videos. If you want a lower quality but with a smaller file size, then go with MP4, which is the standard video format worldwide.
- Video Codecs: Based on all my tests, HEVC (H.265) allows high-quality videos at lower bitrates, making it the best choice when recording videos. Alternatively, the H.264 codec is also a great choice, but it’s less efficient compared to HEVC.
By the way, the same settings may not apply the same with each title. Some games may be – by their nature – very badly developed, and there isn’t much that you can do about it (apart from lowering the recording settings for those specific ones).
The best thing you can do is start recording each game for at least 30 to 60 seconds and check if everything’s smooth and clear before continuing recording for lots of minutes or even hours.
Should you compress your videos before uploading them?
There’s a big debate when it comes to compressing your videos before uploading them on YouTube or any social media platform. On the one hand, compressing your videos will lower the time needed for your videos to get uploaded, thanks to quite smaller file sizes after compression. On the other hand, compressing your videos – even a little – can result in overall lower quality.
If you can avoid compressing your videos before uploading them, then do that. If you don’t have lots of space on your PC or your internet connection’s uploading speed is way too slow, then compressing them may be your best choice.
But why avoid compressing your videos? Well, because most websites, including YouTube and all social media platforms, will automatically start compressing your videos to save even more space – even if you already did that for them. With that in mind, your videos will be compressed twice, losing even more quality along the way.
Keep in mind that, social media platforms such as Facebook, Instagram, and TikTok, among many others, include a very aggressive compression to save as much storage space as they can (I mean, someone has to pay for that if users use them for free).
The thing about social media platforms is that many of them are adaptive to streaming, meaning that based on your viewership, the videos with the most views will result in higher quality, while those without many interactions will get a lower quality to save bandwidth.
If you want to compress your videos and have full control over their quality, there’s nothing that can easily beat HandBrake, which is the most popular and free option for compressing videos (it’s available for Windows, macOS, and Linux).
The best ways to record your gameplay in Windows and Linux
There are many ways that you can record your games, but it all depends on the features you want. For example, you can avoid installing a third-party tool and use Microsoft’s own Game Bar to record your games or go as far as using a more advanced tool that even lets you live stream your gaming sessions.
If you’re using multiple monitors and you want more advanced options when it comes to video and audio quality, keep in mind that you’ll also need pretty strong hardware that can handle all of that – especially for gamers looking at recording in 4K. Thankfully, even if you don’t have a powerful PC, you can still record your gameplay, but in lower quality.
Steam (best for Steam games)
Available for: Windows & Linux.
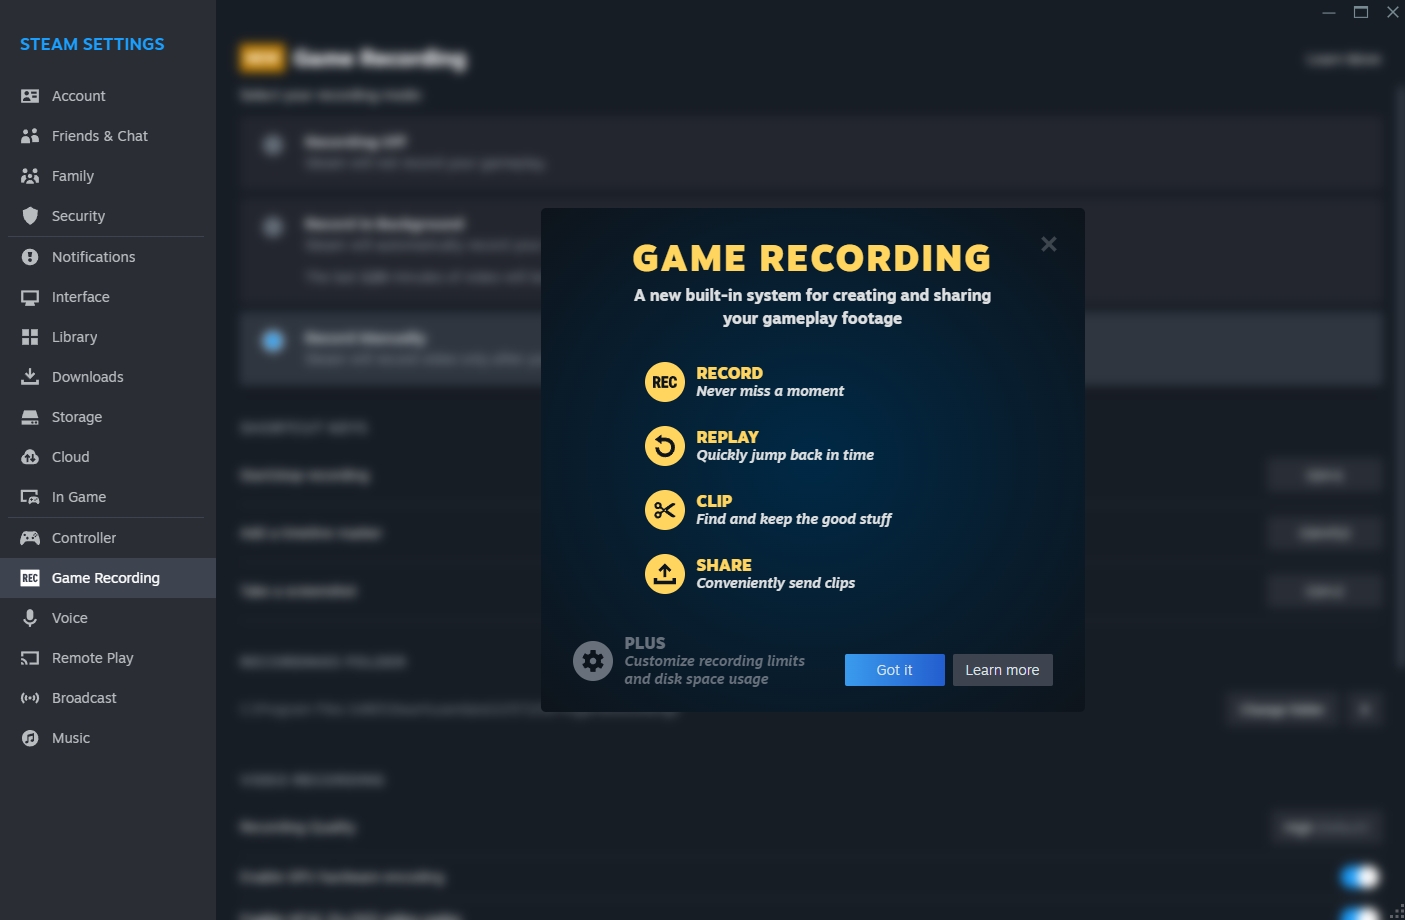
If you want to record games that you play on Steam, then using the app’s integrated record tool is the best choice overall. I can’t even count the times that other applications were unable to record a Steam game, resulting in a black screen with only the game’s sound being heard, or even having to deal with a bit of lag, and Steam was the only solution.
You can use Steam’s recording tool to record your videos or take high-quality screenshots, and you can even adjust its settings based on your hardware. As of this moment of writing, Steam lets you choose between Low, Medium, High, and Ultra quality, and each of those options will result in lower game resolution and bit rate. The “High” quality option seems to work great in most cases, while the “Ultra” will provide a clearer video quality, but their size is usually huge.
You’ll also need to add a shortcut for your keyboard so you can start and stop your recordings at any time. All the settings can be found on Steam’s Settings page: Click on View -> Recordings and Screenshots -> Adjust the settings.
OBS Studio (best for every operating system)
Available for: Windows, macOS & Linux.
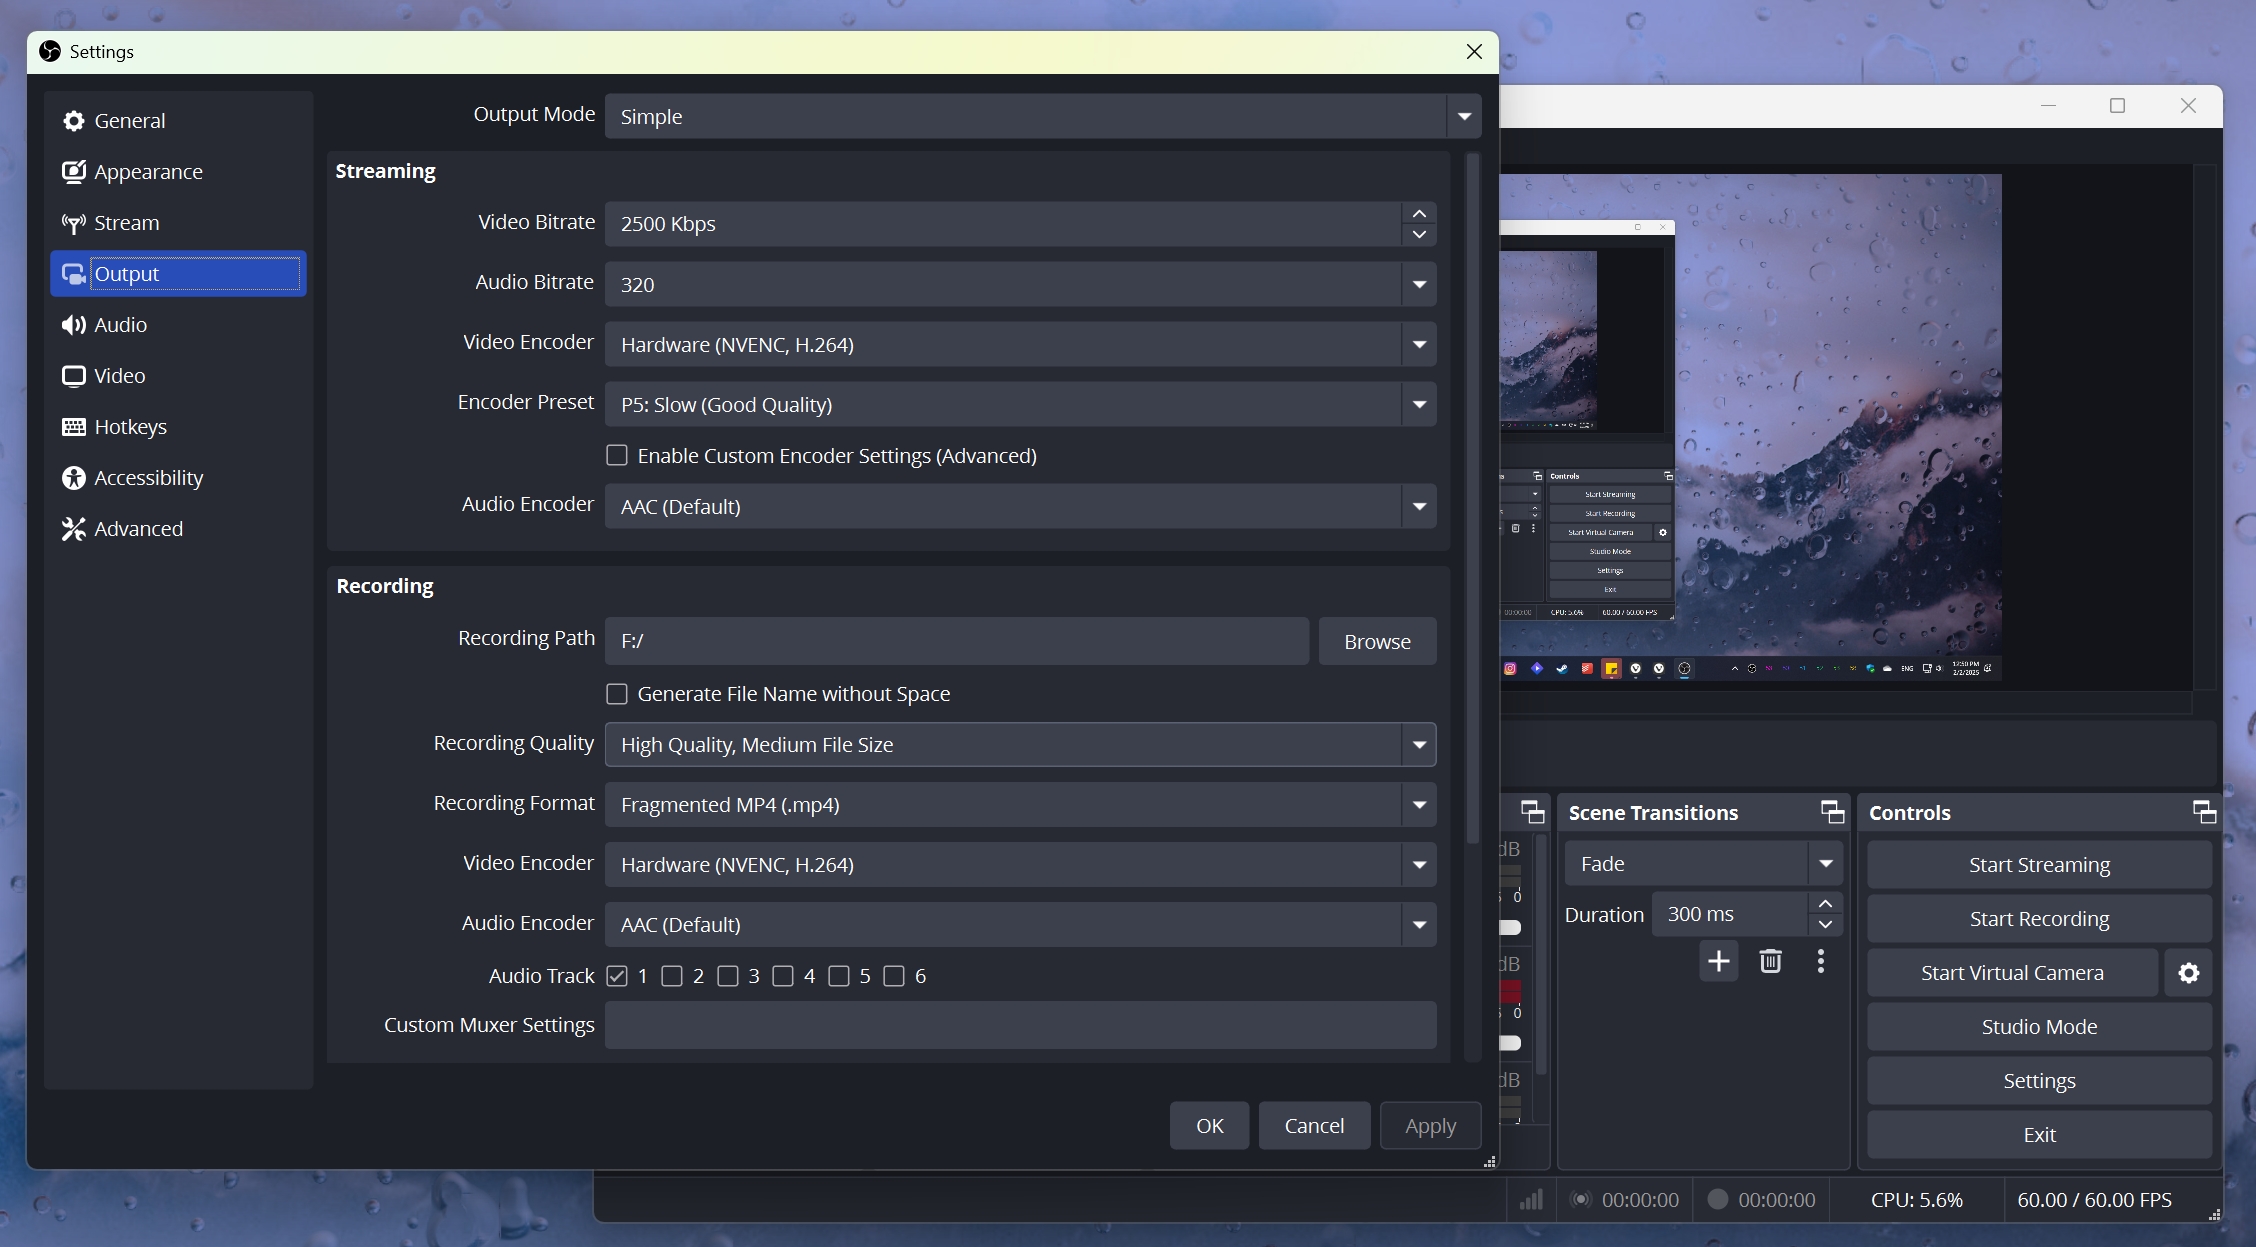
Still to this day, OBS Studio is the most popular recording software in the world – and for all the good reasons. If you go on Twitch, YouTube, or any other platform that includes game videos and live streaming, most of the gamers will most probably use OBS Studio to record and live stream. It is the ultimate solution that can easily work with the most popular platforms, and it has tons of options to adjust it to your needs.
Unlike other solutions in the article, OBS Studio is the most difficult one, because you’ll have to experiment a lot with the software if you want the best results. On the one hand, you can put everything at their highest settings and, even with a powerful gaming PC, you’ll experience tremendous lagging. It’s all about making sure that you’ve chosen the best settings for your hardware, including the resolution, bit rate, frame rate, and especially the codecs and encoder.
I can’t specify all the settings that you’ll have to look at and adjust based on your hardware because that would take a whole article, but going to OBS Studio’s settings you should find the “Output” and “Video” options, which mostly include the most important configurations for your recordings. You can choose between a software and hardware encoder, video format, recording quality, audio quality, and so much more.
NVIDIA ShadowPlay (best for NVIDIA GPUs)
Available for: Windows.
If you own an NVIDIA graphics card, ShadowPlay is arguably one of the easiest, friendlier, and most recommended options for recording your games, taking high-quality screenshots, and even live streaming your gaming sessions with your friends – have I mentioned that’s also completely free?
What I love about NVIDIA’s ShadowPlay is its “Instantly Replay” feature, and here’s how the company describes it: “Just pulled off an amazing stunt? ShadowPlay’s DVR-style Instant Replay mode already recorded it! Just hit a hotkey to save the last 30 seconds of gameplay to your hard drive or share to YouTube or Facebook.”.
It’s not a tool for kids either, as you can use ShadowPlay to record even 8K HDR videos at 30 frames per second, or up to 4K HDR at 60 frames per second. It’s also hardware-accelerated software, meaning that it can run in the background without impacting your overall performance.
Editor’s Note: I’ve tried multiple times to install NVIDIA ShadowPlay and failed each time, giving me an error, “NVIDIA Installer failed”.
Note for AMD users
For AMD graphics cards, there’s the AMD Radeon ReLive as an alternative that you can use to record your games, but I never used it before, so don’t ask me any questions related to it.
Windows Game Bar (if you don’t want a third-party tool)
Available for: Windows 10 & 11.
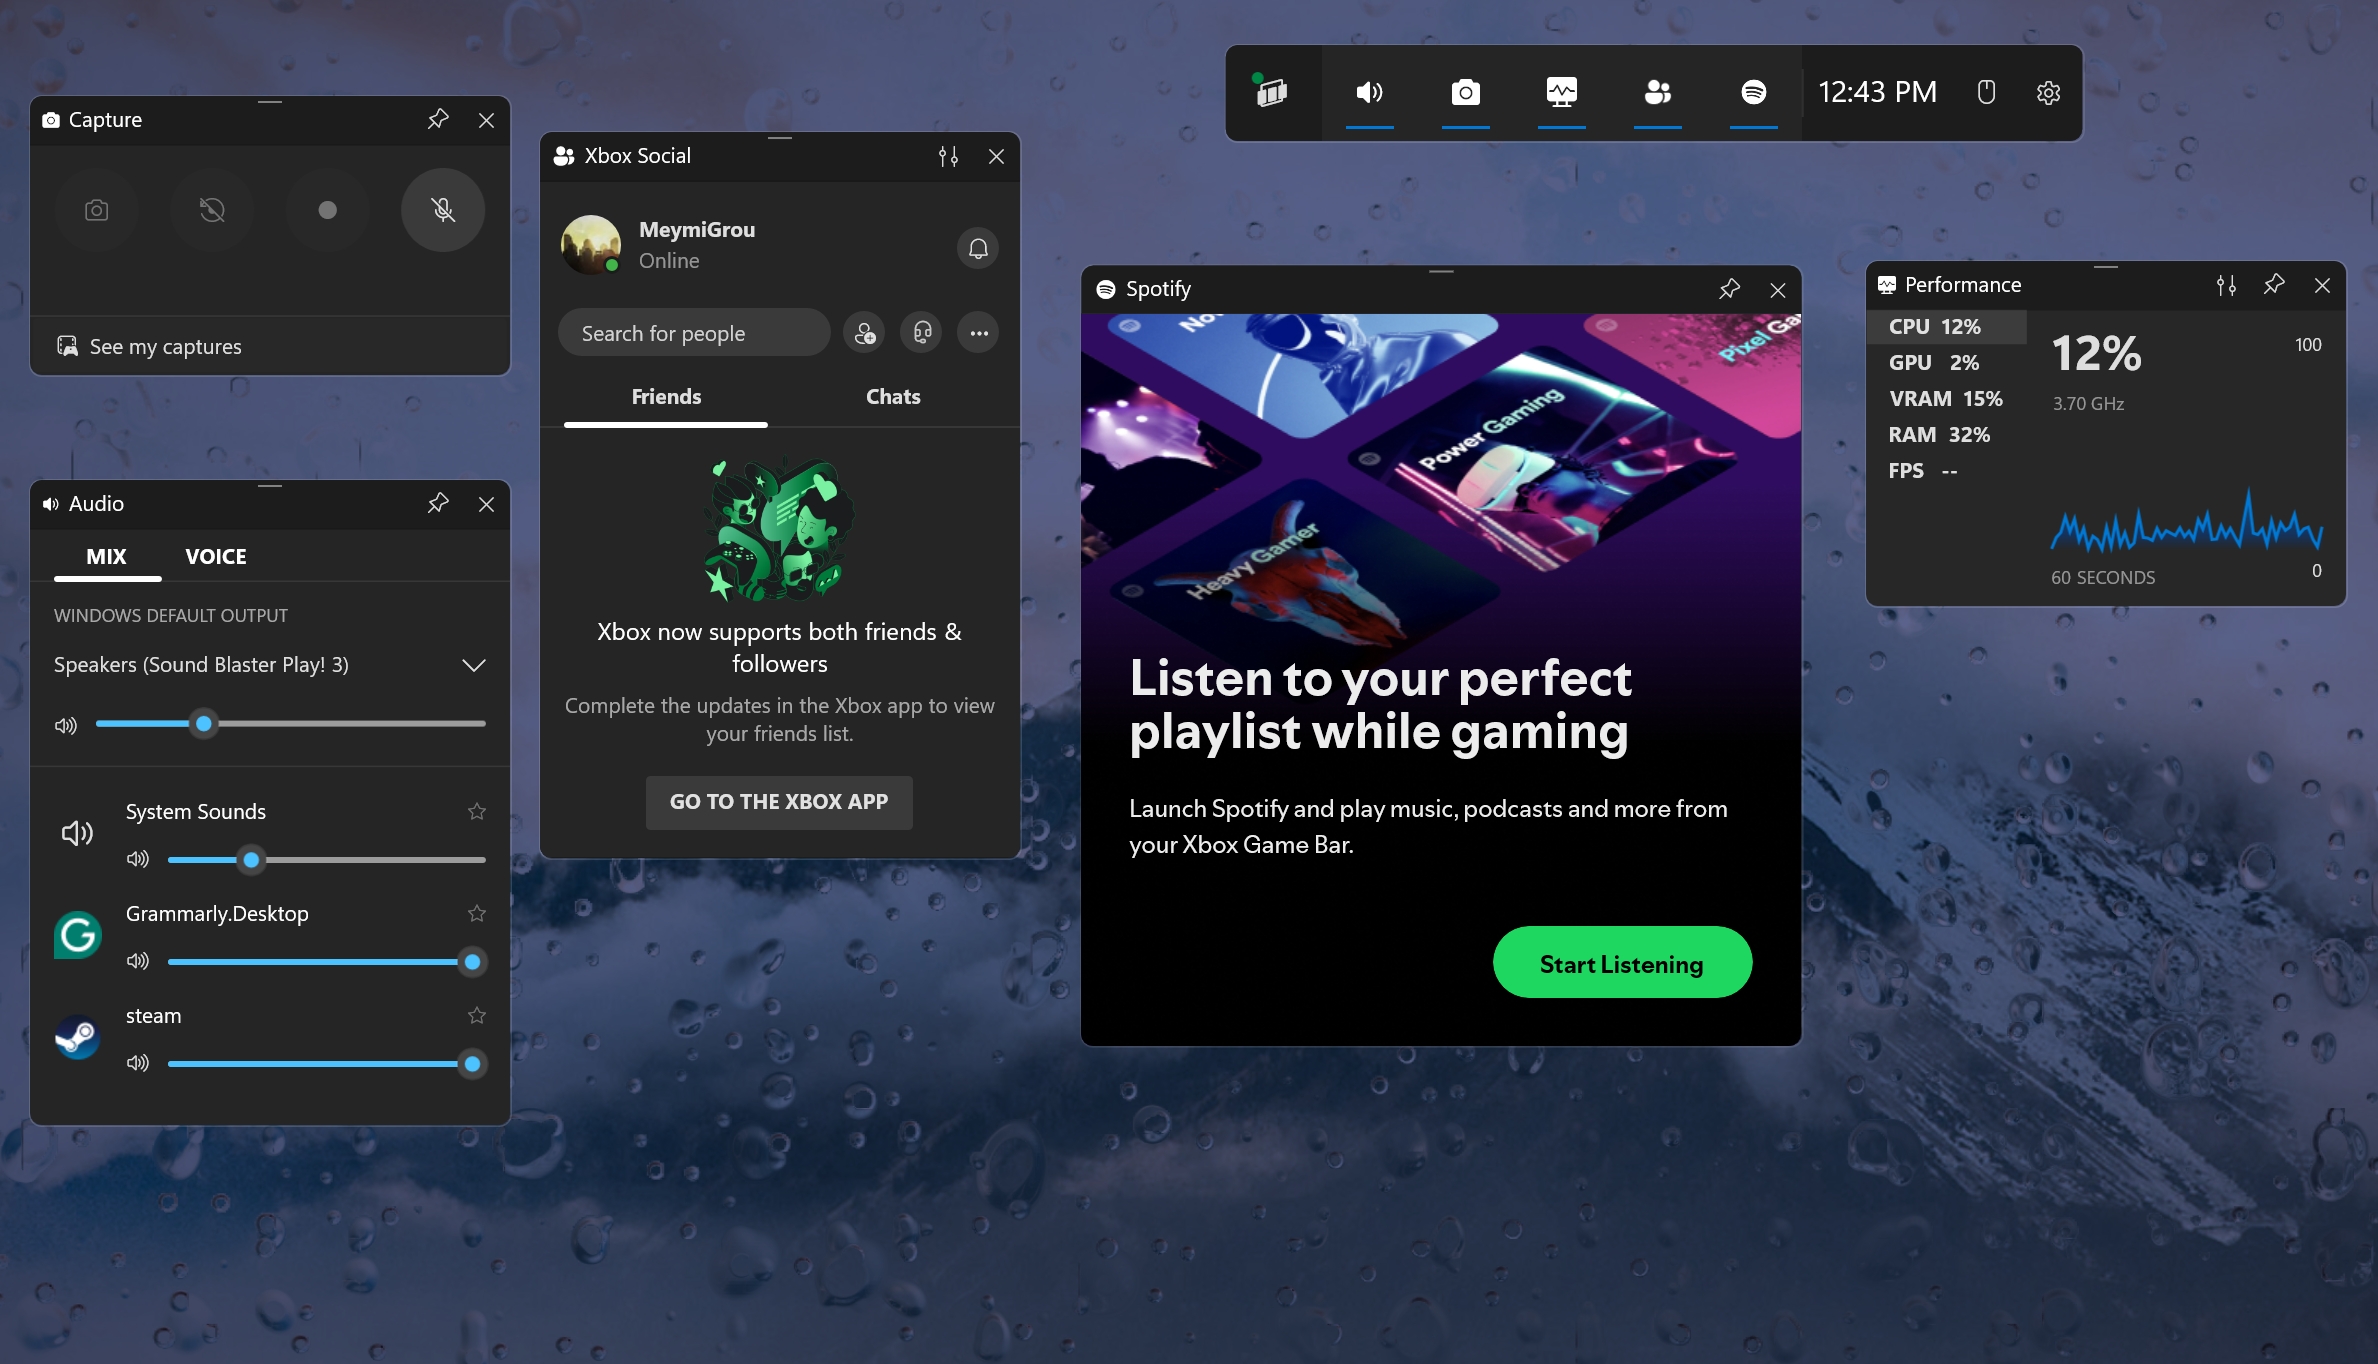
If you’re a Windows 10 or 11 user and you don’t want to download and install a third-party tool, then you’re lucky! Microsoft has built and integrated its own game recording tool inside the Xbox app (if you deleted it, you can find it available on the Microsoft Store). Although I haven’t used it much, it did its job just fine through all of my tests, providing a smooth playback even with 4K quality.
You can use the Game Bar to record your games, take screenshots, or even use its “Record Last” feature to turn your most recent moments of gameplay into a clip – exactly as you would with NVIDIA’s ShadowPlay. Being integrated into Windows means that you won’t have to run anything else in the background or lose any more disk space by installing a third-party tool.
To enable the Game Bar and see all of its options, you can use the keyboard shortcut: Windows logo key ⊞ + Alt + R. If you don’t see it, try to load the game first. If it still doesn’t work, head over to the Microsoft Store, search for “Xbox“, install it, and you’re good to go.
Editing your videos before uploading them
Recording your gameplay is fairly easy nowadays, but editing your clips before uploading them is a whole other story. Thankfully, once again, there are plenty of options to choose from, but it all depends on your hardware, needs, and how far you want to go (such as applying special effects, creating modern intros, etc.)
Choosing a good editing software is not that difficult, but do keep in mind that many of them are freemium, meaning that you’ll have to get the Pro version if you want to unlock and access all of their features and options. Some of them may even be completely premium, in which case you’ll have to have a budget.
DaVinci Resolve (best overall)
Available for: Windows, macOS & Linux.
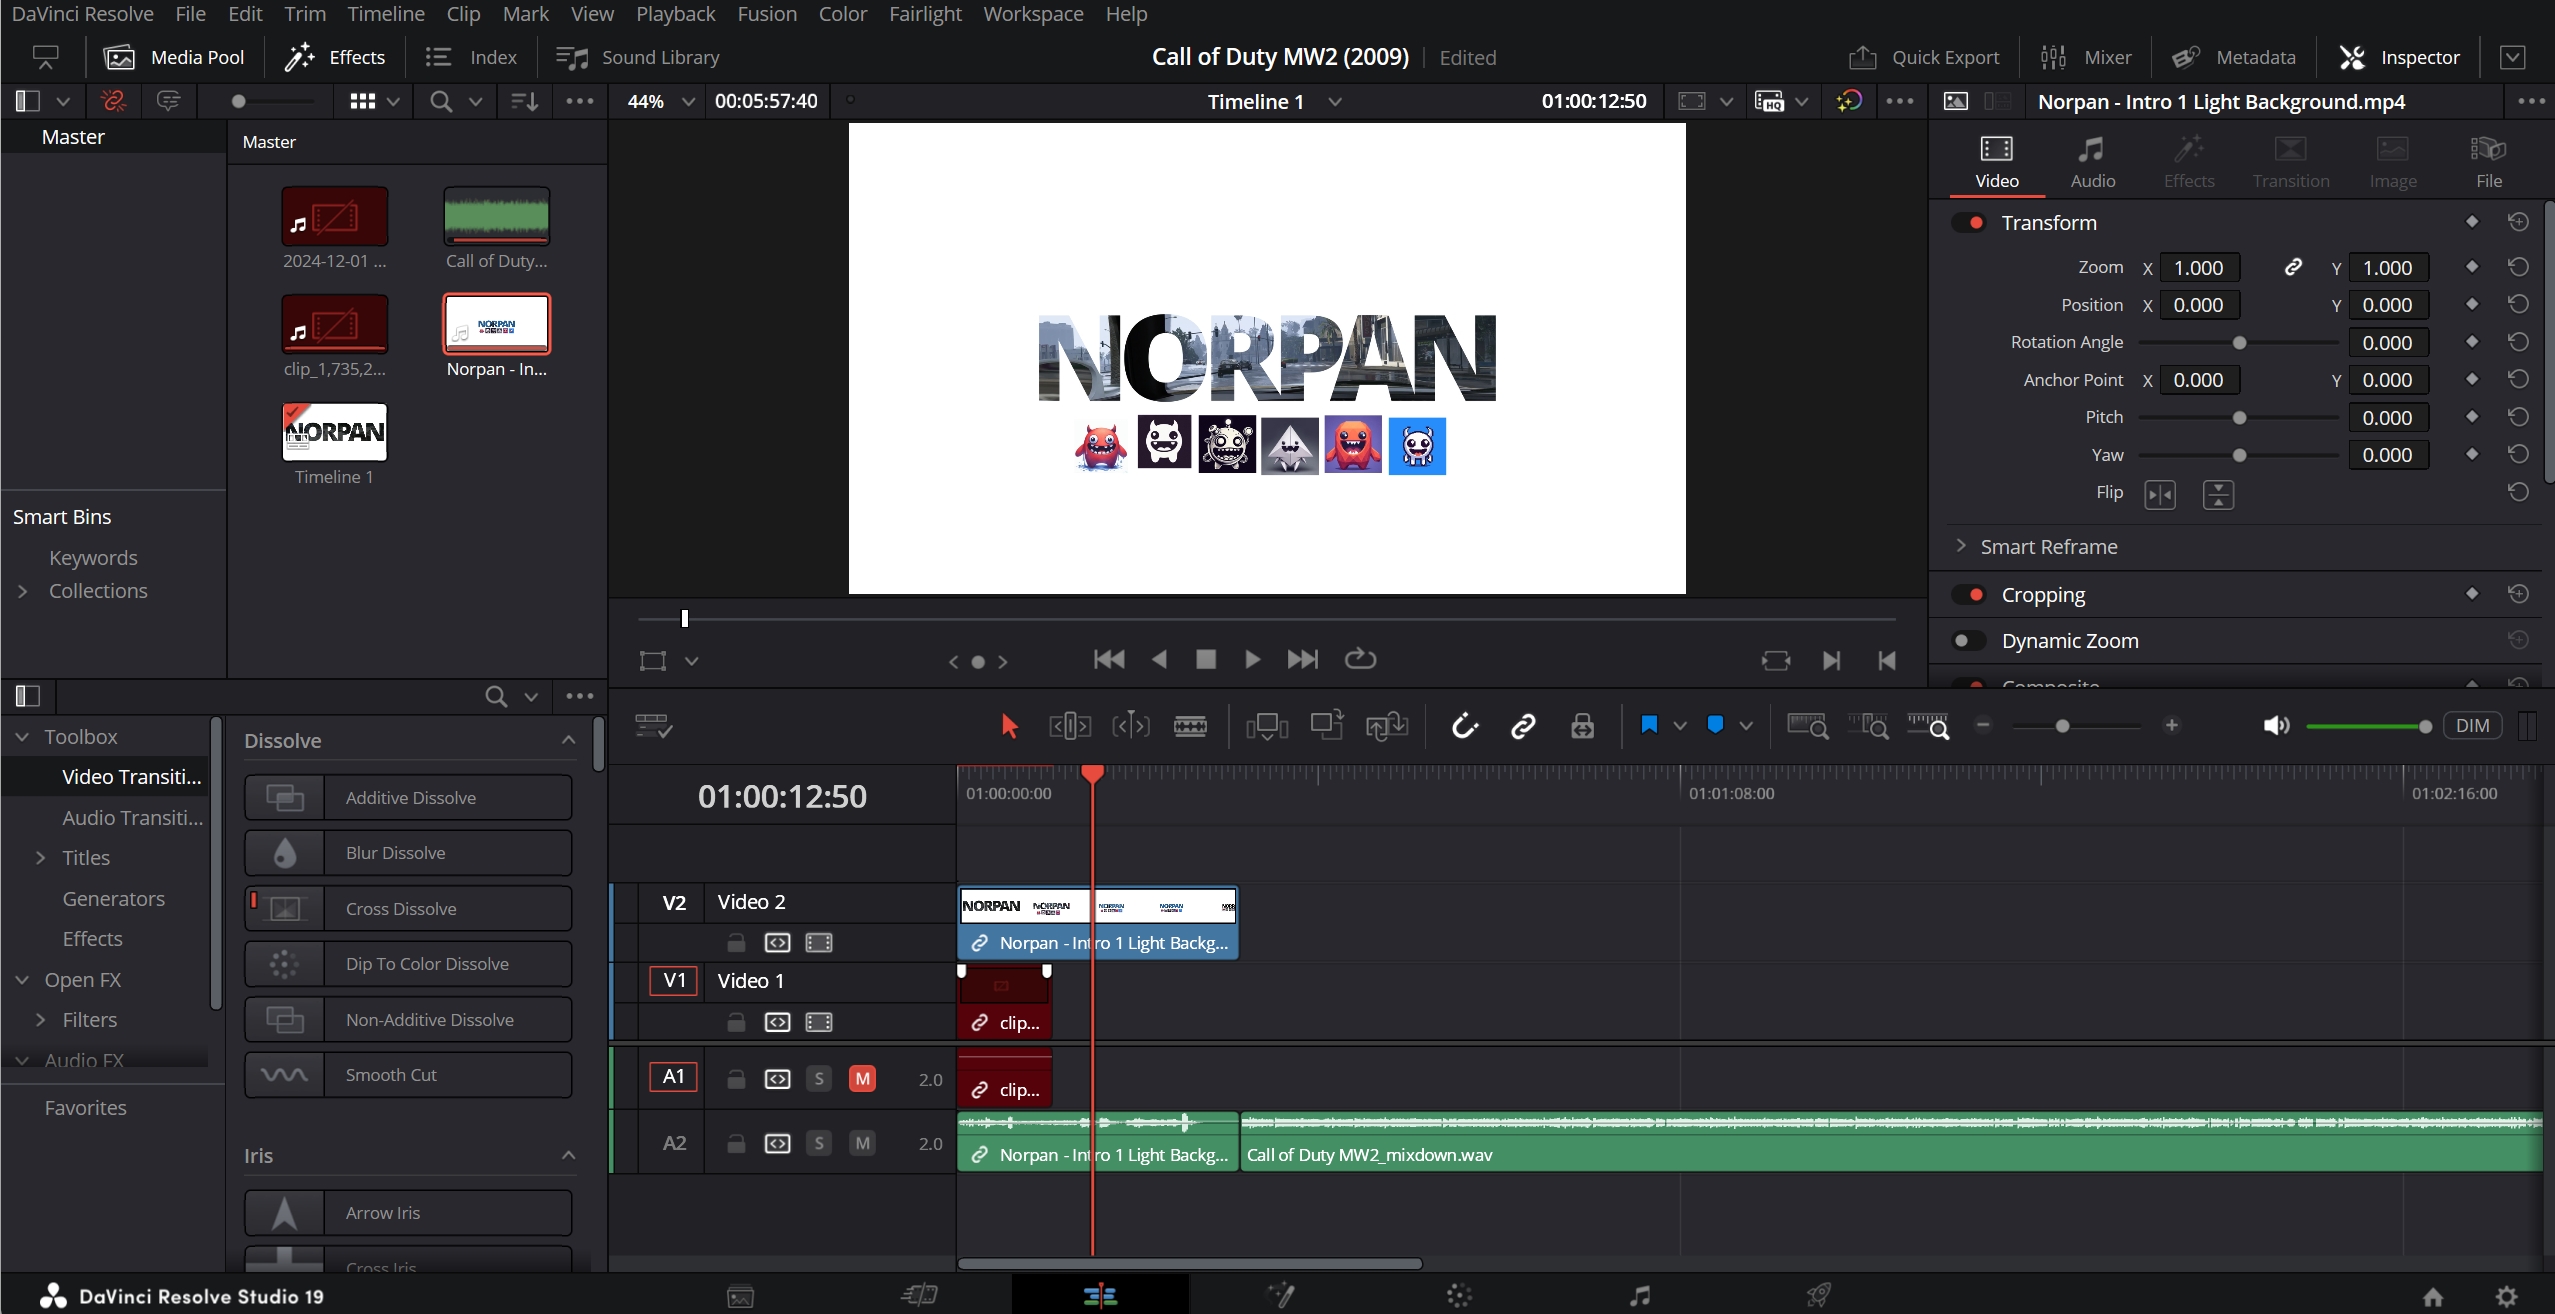
DaVinci Resolve is arguably one of the best (if not the best) software to edit your videos, from short clips to videos that may last hours, there’s nothing that can beat this video-editing monster. It has a free version that has the most options and features available, and it can be easily used for high-quality editing without the need to get the premium version.
This is the software that even Hollywood uses for its movies and TV series, and it has a unique interface that once you learn how to use, it will be impossible to work with anything else. There are also hundreds of thousands of templates, video and audio effects, intros, outros, and whatever you may be looking for available on third-party websites that you can buy or download for free. Importing them is fairly easy and it takes less than a minute, and you can edit them in tons of different ways.
Unlike other options, DaVinci Resolve’s premium version will cost you $295 for lifetime access to its pro features and unlimited updates to newer versions. Yes, it’s not a subscription-based software, and that’s pretty cool.
Adobe Premiere Pro & After Effects (best for Adobe’s fans)
Available for: Windows & macOS.
I’ve used both Adobe Premiere Pro and After Effects for many years. They’re subscription-based applications and, let me tell you, they’re not cheap. If you want access to Creative Cloud All Apps, that will cost you $59.99 per month, or you can pay $22.99 per month for each individual app.
What’s even crazier is that once you get a monthly plan, you’ll have to keep it until 12 months have passed – Adobe doesn’t let you cancel your premium subscription before, and if you truly want to cancel it, you’ll have to pay the cancellation fee. There are many people on forums like Reddit saying that you can avoid the cancellation fee by downgrading your plan and then canceling it, but I don’t know if that works, as I had to keep using the annual plan for up to 4 months even when I stopped needing them.
Believe it or not, though, the pricing wasn’t my biggest consent and the reason I stopped using Adobe’s products. They were laggy, and many times I found myself trying to solve an error for many hours. The last problem came when I wanted to export a video for a client, and I was unable to do so for three whole days. I got so frustrated that I paid for that thing, that I went to cancel my account, only to see that they had a cancellation fee – and I ended up keeping my subscription for 4 months until I finally canceled it and moved to DaVinci Resolve.
CapCut (easiest option)
Available for: Windows, Android, & iOS.
CapCut has seen huge popularity over the years thanks to its friendly-to-use interface and lots of great effects and transitions that it includes. It has a free version, which adds the company’s watermark to your videos, and most of the features and options aren’t available, but it’s still enough to edit and create cool clips.
The premium subscription will cost you around $45.00 per month (except if you get a lower price thanks to their constant offerings) or $34.75 per month if you choose to pay for the annual price. If you get the premium version, you can use the tool for 3 social media accounts, access their AI-powered video and image creation, get lots of free creative assets for commercial use, and 500GB of cloud storage on their platform.
Although CapCut is a great option if you choose to go with its premium model, there are many drawbacks for me that kept me away from it, starting with the interface. It’s easy to use, yes, but if you ever used more advanced tools such as DaVinci Resolve or Adobe Premiere Pro, CapCut has way too many limitations.
Yet again, if you don’t want anything too complex, the software uses its cloud platform to automatically edit your videos and to do so, it has to upload the clips on the cloud first – something that can take many hours depending on your video’s size and internet upload speed.
Wondershare Filmora (for lots of great pre-made effects)
Available for: Windows, macOS, Android & iOS.
There are many good reasons to choose Wondershare Filmora as your video editing software of choice. First and foremost, it currently costs $59.99 per year, which is much cheaper than other alternatives, and there’s also a cheaper plan that costs $49.99 per year.
But why choose Wondershare Filmora? Well, apart from its modern and easy-to-use interface, which is perfect for people looking at using simple software and avoiding the learning curve that comes with other alternatives, it has many great features that you’ll love. For example, some of the best features that Filmora offers include a smart short clips tool, smart scene cut options, text-to-speech, AI copywriting, and lets you automatically enhance your videos using artificial intelligence.
Unfortunately, even if you have a premium subscription, Filmora will still use their AI Credits each time you use their AI-powered tools. The Advanced Plan includes 1,000 AI credits, but if you do heavy work, they won’t be enough. You’re also limited to 10GB of cloud storage, which if you think about it, they’re less than you get from registering as a free user on many cloud platforms, and surely not enough for videos.
Disclaimer: It’s been years since I last tested Filmora, and when I did they didn’t have all those AI tools and options implemented. I’m sure it has become even better than it was, but don’t take my words too seriously, try it yourself and see if it works for you.
Finding the perfect “Gaming Kit” for your recordings
At the end of the day, it’s all about finding the perfect “kit” that will work without issues or lagging with your hardware. For me, Steam’s integrated recording is the perfect match when it comes to playing Steam games, but if I’m I play anything else, OBS Studio is my go-to recording tool.
It’s important to test most of the applications that I’ve mentioned in the article if you truly want to find the perfect workflow for your needs, especially when it comes to recording high-quality videos without losing performance. Almost all of them give you either a free version that you can test or even a free trial period that you can use to see if that specific software is right for you before investing in its pro version.
For most people though, OBS Studio with DaVinci Resolve will give them the freedom to create from simpler to more complex and longer gaming videos with many effects, transitions, better audio, and so much more. It’s the best free kit that you can possibly get for Windows and Linux at this time of writing – or the most preferred gaming kit when it comes to my own personal taste.
Which software do you use to record and edit your videos? Have you faced any issues and which settings work the best for your recordings? Let me know in the comments down below.

